If you’ve ever found yourself photographing a scene asking “Will this look good when I crop it for Instagram?” or “Will the whole plate fit the frame when I crop this to a square?” this tutorial about composition guides is for you.
If you landed here from YouTube, here’s the promised download:
Also, we’re using Capture One as a part of this tutorial. You can download a free trial here.
Aspect Ratios
It helps to start this tutorial with an understanding of the term “aspect ratio.”
The aspect ratio of an image is the ratio of its width to its height expressed by two numbers separated by a colon.
A square image is a 1:1 aspect ratio. Its long and short edges are the same length. Something intended to be shown full-screen on a cell phone is displayed in a 9:16 aspect ratio.
You can see these ratios in play in these comparisons.
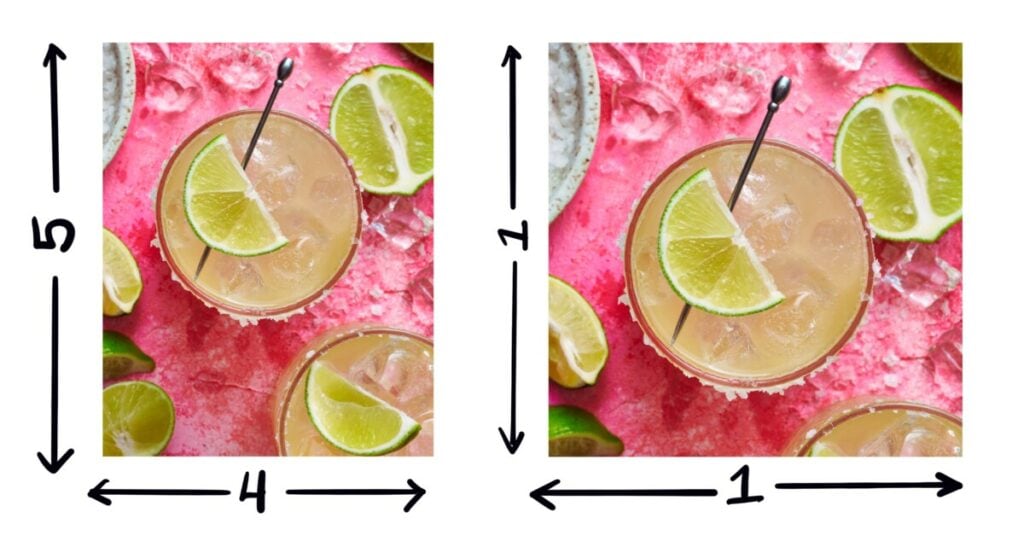
First, let’s compare 1:1 versus 4:5. From an initial glance, they look fairly similar. But on closer inspection, the 1:1 is perfectly square because the vertical and horizontal sides are equal. The 4:5 has a slight vertical orientation because the vertical sides are slightly longer than the horizontal sides by a ratio of 4 to 5.
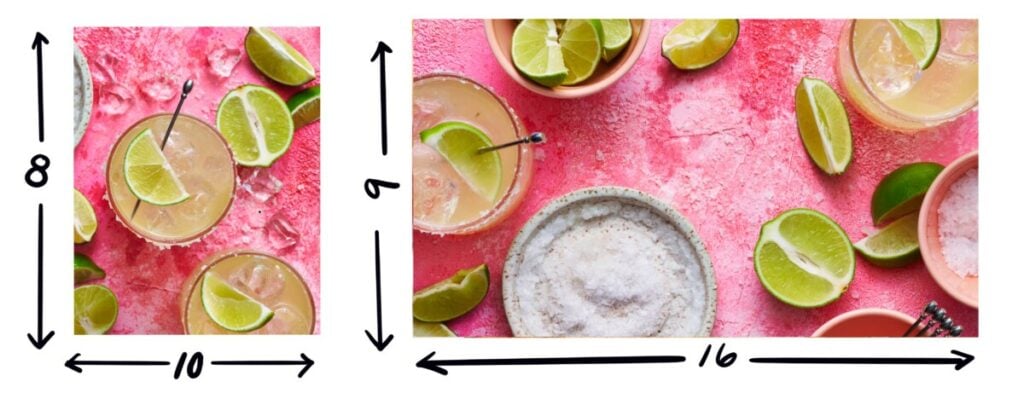
Let’s compare another combination. Note that simply because the numbers get larger doesn’t indicate a specific shape. Because we’re working in ratios, what’s important is the relationship between the two numbers. Here you can see 8:10 versus 9:16. The 8:10, which (let’s do some math) if you divide both numbers by two is 4:5 which is nearly square, but not quite. Where 9:16, the long edge is nearly double the short edge, making for a long, skinny aspect ratio.
DSLR and Mirrorless Aspect Ratios
Things get a little tricky because our DSLR and mirrorless cameras by default shoot in a 2:3 aspect ratio. But what if the image is being used in a place that has a specific aspect ratio that’s different from 2:3? And not only that, but in this age of digital media, one image might need to be used across a variety of platforms.
I have a client who displays an image on their website at a 4 x 5 ratio, but then uses those same images on social media at the 1 x 1 aspect ratio. I want to make sure when I’m capturing the image, it will look nice in both formats once it’s cropped.
The solution is to shoot tethered and use the Overlay Tool in live view with custom overlay guides in Capture One. I’ll show you how I use this tool plus provide my templates for you to download.
If you’re not familiar with shooting tethered, check out this post about tethered shooting basics first, and then come back to this post and go further down the rabbit hole.
The Overlay Tool in Capture One
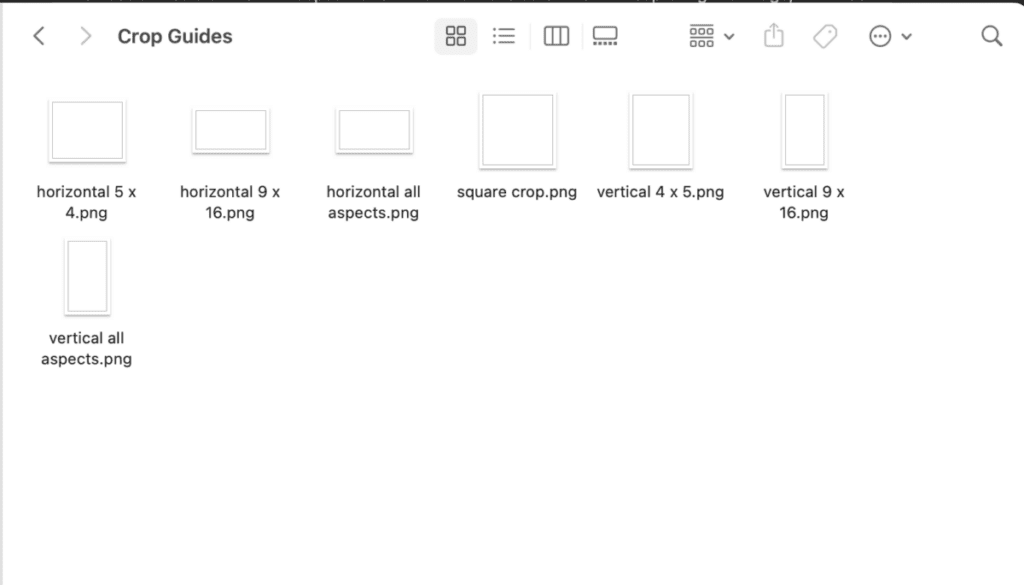
First DOWNLOAD the Crop Guides. These composition guides are all transparent .PNG files that represent the aspect ratios I most often use for myself and my clients. (crop guides in folder)
- 1:1 Square
- Horizontal and Vertical 4×5
- Horizontal and Vertical 9×16
- and a full spread of all three ratios in a horizontal and a vertical option
Next, navigate to the Overlay Window
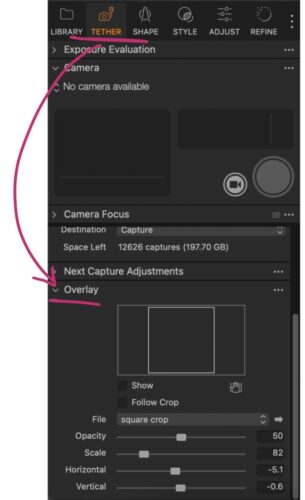
and select “Choose File”
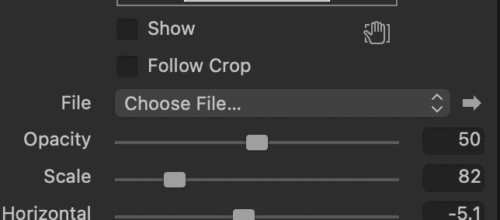
This will open a window where you can find the Crop Guides you just downloaded.
If you prefer to watch a video of me walking through this, scroll to the video tutorial linked at the top of this post.
Next, select one of the guides and it will import into Capture One. You can only import them one at a time, so repeat this process for all seven of the Crop Guide files until they’re all loaded in.
Next, click on the “File” window and select one of the guides. I’ll use the “vertical 4 x 5” here.
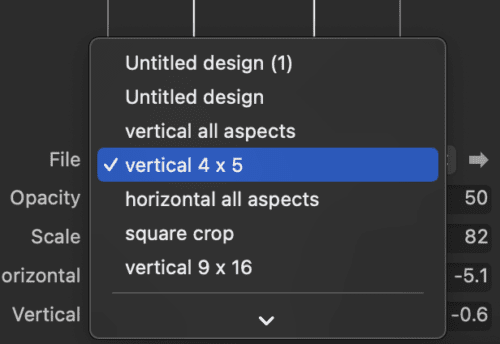
Then make sure that “Show” is selected.
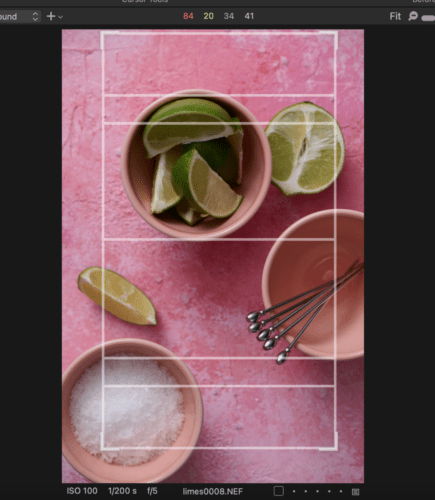
You will see that there is now a white rectangle on top of your image. This rectangle is a 4 x 5 size and represents where your image will be cut if you crop it to 4 x 5.
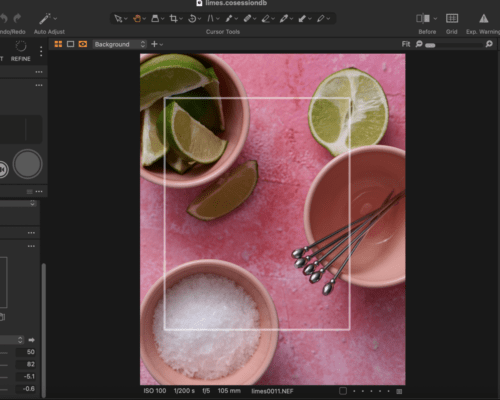
So if you are capturing something intended to be displayed on a phone, you know what will be in the frame and what will be outside once it’s cropped!
Move the Overlay
You can adjust the overlay and move it around or make it bigger or smaller by selecting the “move overlay” tool to the right of the “show” option.
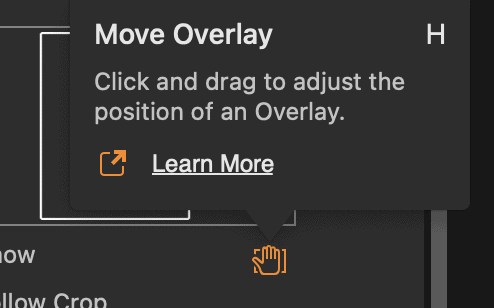
You can also quickly access the “move overlay” tool by hitting the “h” key. Once you’ve adjusted the overlay hit “V” to resume your regular select tool.
That’s the 4 x 5, but then you can load in the square or the 9:16. I also include an “All Aspects” version for vertical and horizontal compositions so that you can see square, 4 x 5, and 9 x 16 at the same time overlaid together in case you have one image that will be used in all three formats. Guarantee great composition no matter how you crop it!
Use It in Live View Mode
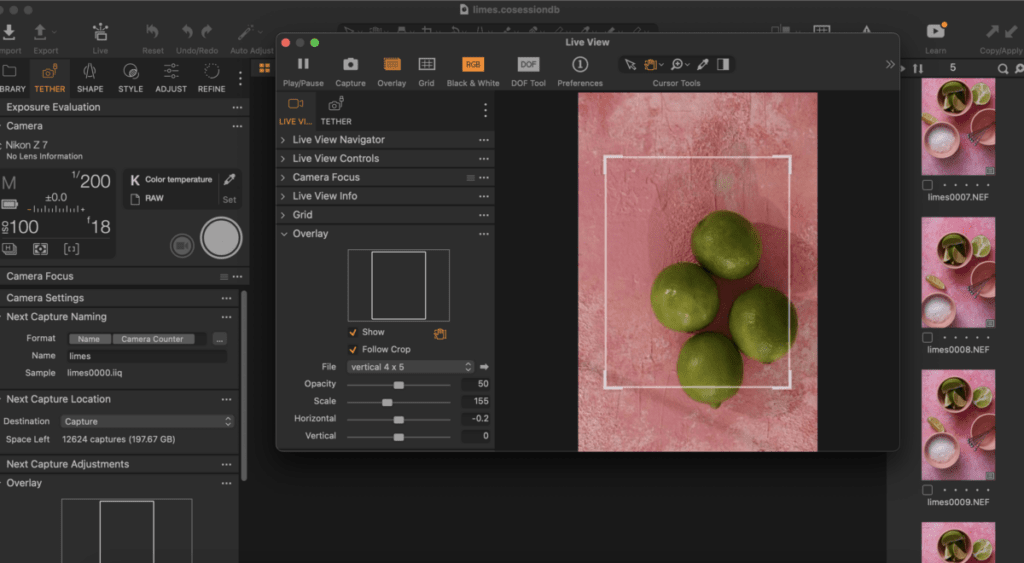
Of course, what’s even more magical is knowing the composition is correct before you’ve even hit the shutter button. You can see these same overlays if you are in Live View Mode.
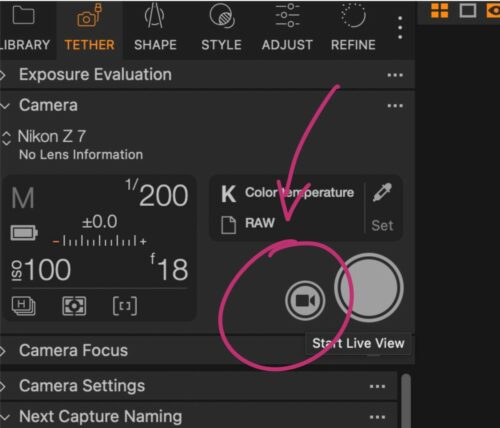
Go to “Start Live View” like you would for tethered shooting.
If you’re brand new to tethering, check out our Basics of Shooting Tethered Blog post.
Then in the “Live View” menu go down to the “overlay” menu and as long as you have the .png crop guides loaded in and have Show turned on, you’ll see the guide over top of your live view. This allows you to compose the scene to the crop before taking the image!
Beyond Composition Guides
The Overlay Tool in Capture One is not limited to composition guides. Our friend Darina at Gastrostoria offers composition guides to help you nail balanced and artful compositions.
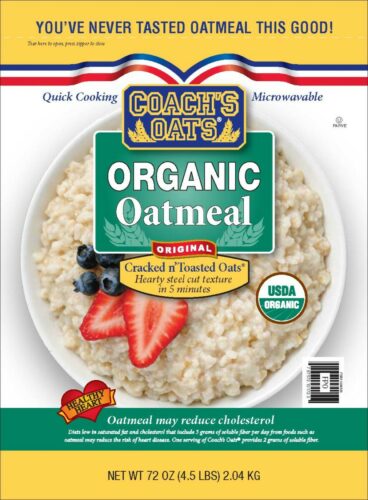
The Overlay Tool is also game-changing when photographing for magazines or products where there will be words and artwork placed on top of the image. For example, for this bowl of oatmeal (Coach’s Oats) I asked the client to send over the transparent .PNG version of their artwork. In Capture One live view we were able to set up the oatmeal and toppings so as to ensure it would fit perfectly in their final layout.
When Precision Matters
When precision matters having tools like the Crop Overlay tool can save you a lot of time during a shoot and provide you peace of mind knowing that you got the shot.
Next up, our final tutorial in this series covers a tool that helps ensure client satisfaction on shoot days. I flipped when I discovered it and can’t wait to share it with you!


