Does the idea of photographing drinks make you nervous? That’s normal! The reflective nature of glassware can make drinks particularly challenging to photograph. But, with a few helpful skills down you might actually discover that you like photographing drinks! After all, liquids create an extra level of visual magic, especially when it comes to lighting.
Let’s dive into two of my favorite lighting techniques to help you light your drinks and manage reflections like a pro!
Side note, in all of these setups, the lights I’m using are all artificial. If you’re new to artificial lighting, no need to be afraid. I have a free step by step mini course called Pick Your Perfect Light that you can join to help you decide on gear and get the basics under your belt.
Tip 1: Use Back Light to Eliminate Reflections
I often default to capturing drinks with the primary light source positioned behind the drink, referred to as back lighting. This setup works well for managing reflections because the large highlight that is created when the light directly reflects in the glass is behind the subject, not visible to the camera.
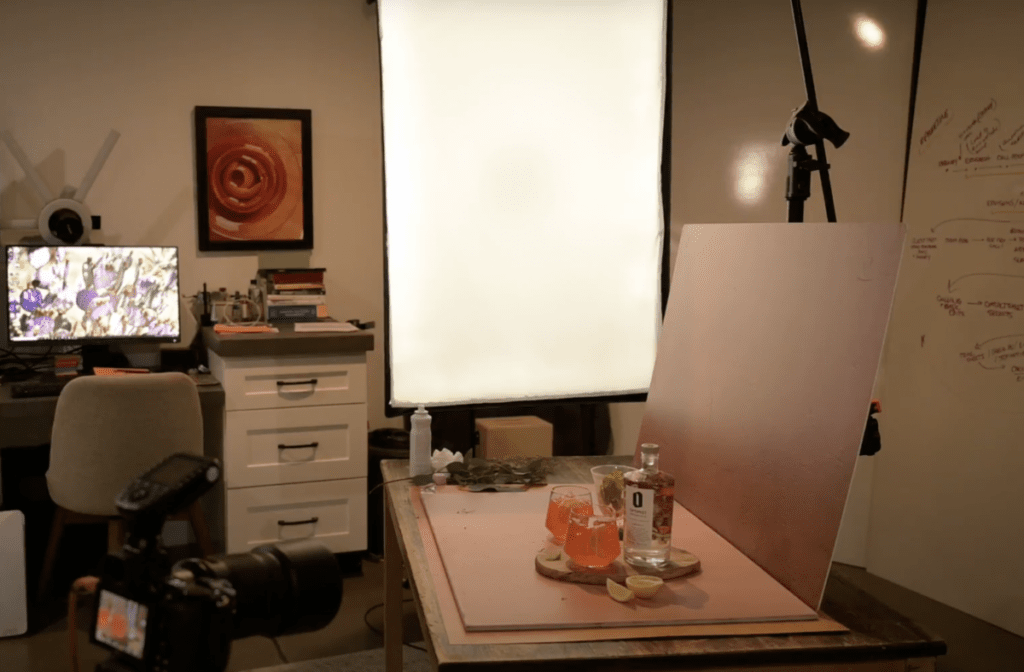
For example, you can see this setup captured with the light in two different positions. The one with the light positioned to the side you can see the large reflection of the softbox in the side of the glass. When the light is behind the drink the reflection is no longer visible.
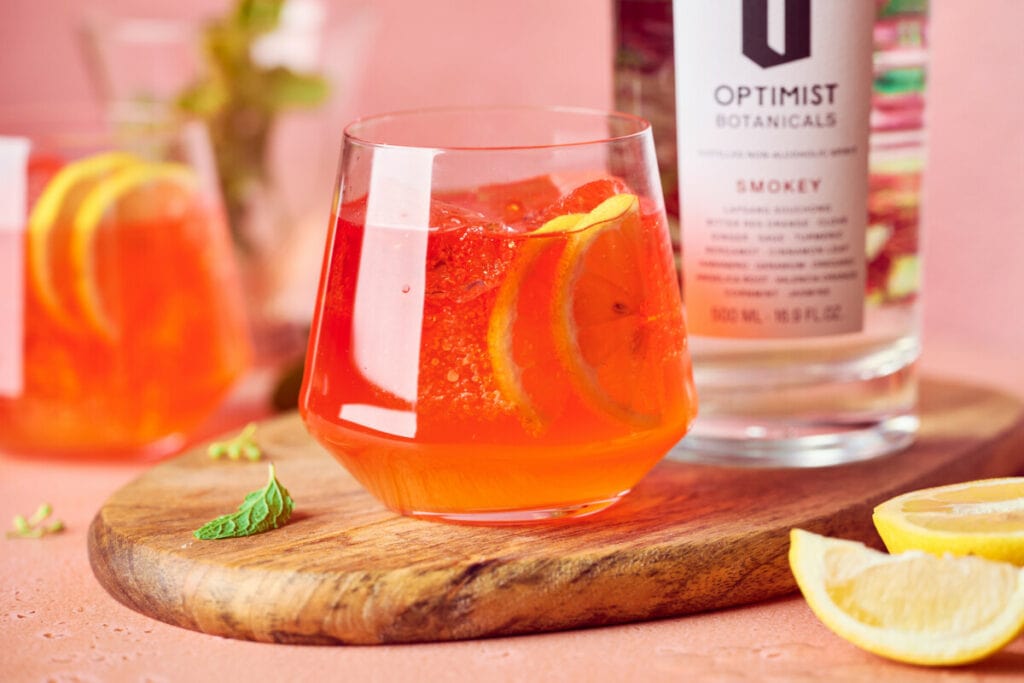
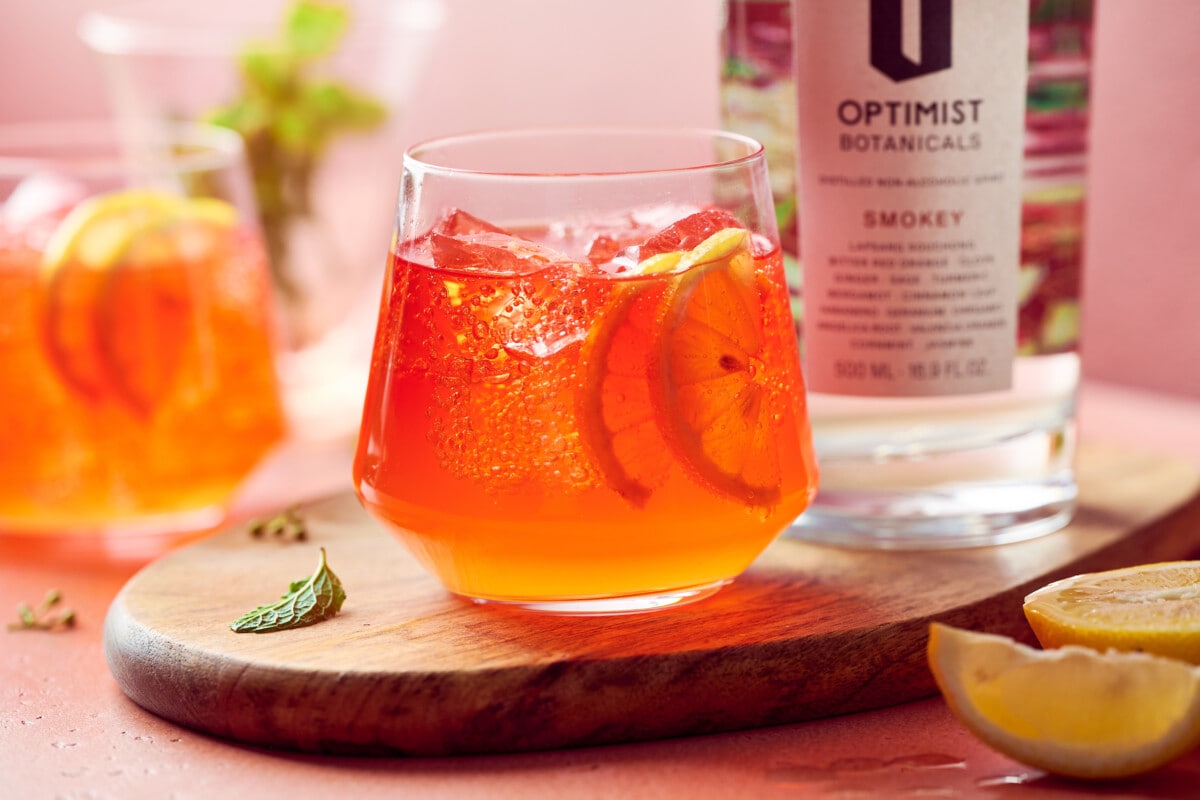
That said, I don’t want to start a rumor that highlights and reflections are bad. In truth, they can help create dimension and visual interest in an image! My goal in drinks photography is not to completely eliminate reflections. But I do want to minimize any reflections that are distracting or cover up too much of the beverage. The definition between helpful reflections and distracting ones is is different for everyone and a matter of personal taste. There is no set standard. My recommendation is to study drinks photos you like and pay attention to the highlights and reflections. Find your own preferences and comfort level and adjust your lighting accordingly.
The other magical effect of positioning your light behind a translucent drink is that it can make it glow.
Going back to the comparison of the side light and the back light, you can see the back light adds energy to the drink and draws attention to it.
Tip 2: Hard Light
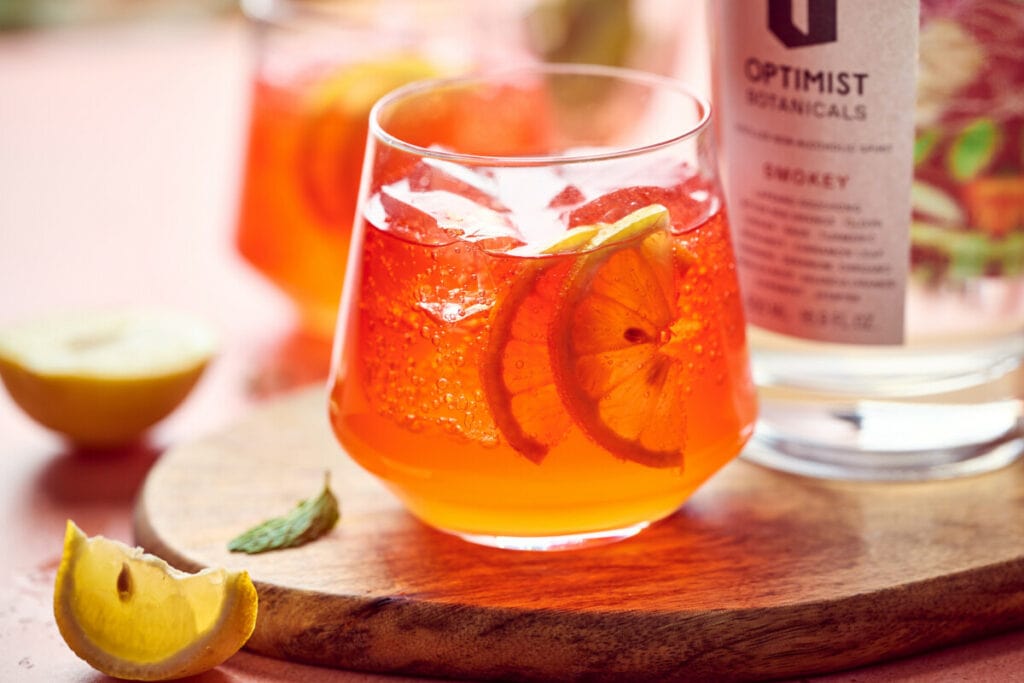
Perhaps you’ve noticed the trend in food and drinks photography to apply hard light to a scene. Hard light is when the shadows being cast have an immediate transition from light to dark. This is opposed to soft light where it’s a gradual, gradient transition, from light to dark. Check out the difference in the shadows between these two photos:
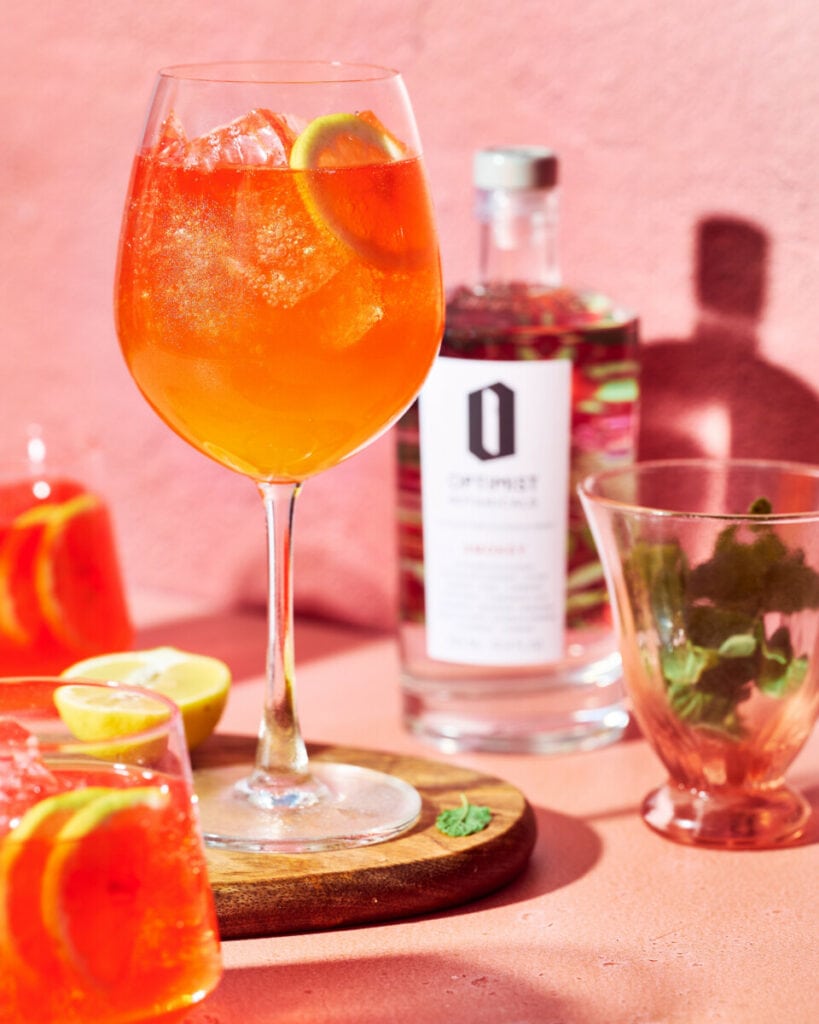
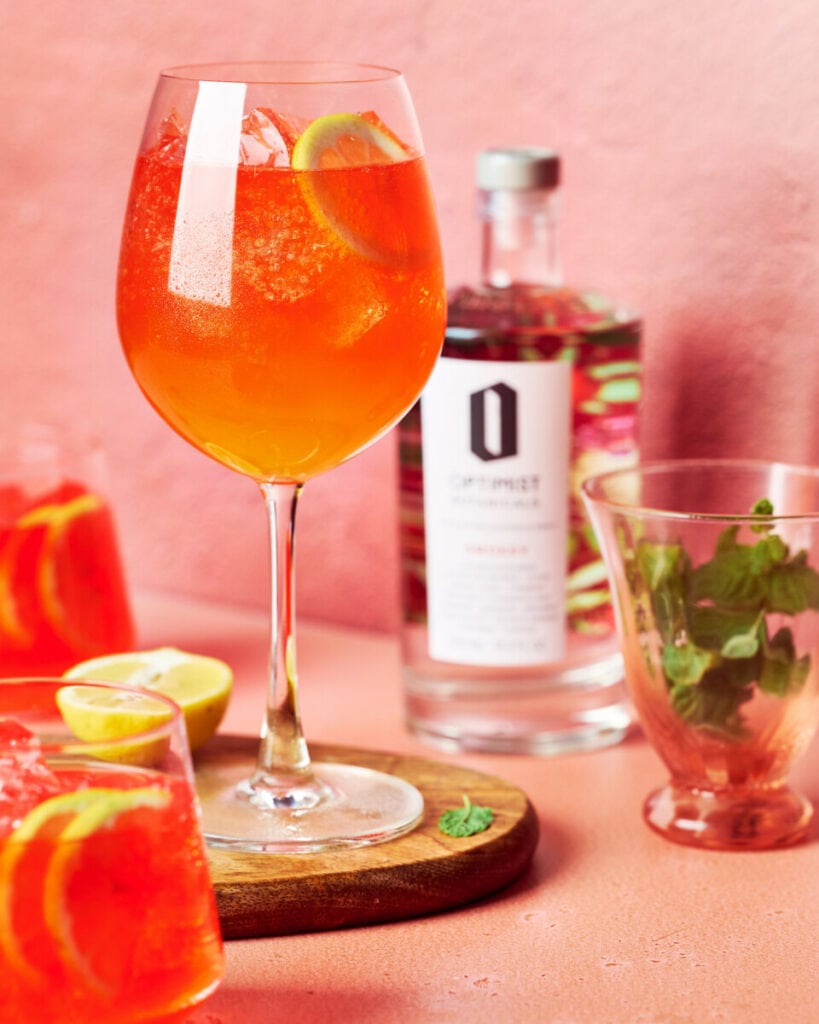
The softness or hardness of light is based on the size of the light source relative to the subject. Large light sources create soft light and small light sources create hard light.
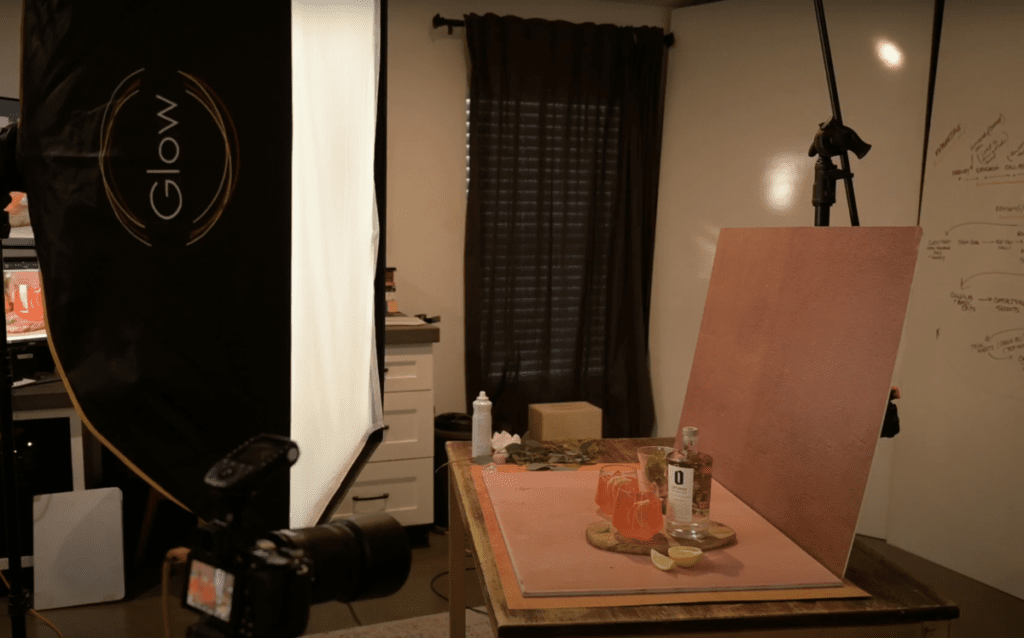
If we look behind the scenes of the hard and soft lit drinks images you can see this principle in play. The soft light is created by a large softbox. The hard light is created by a bare light, which the source in comparison is very small.
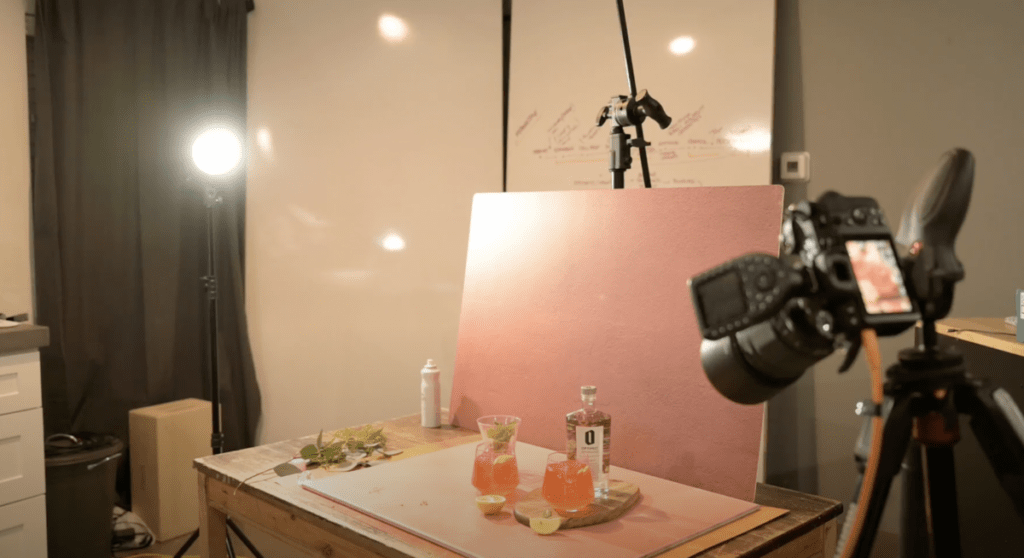
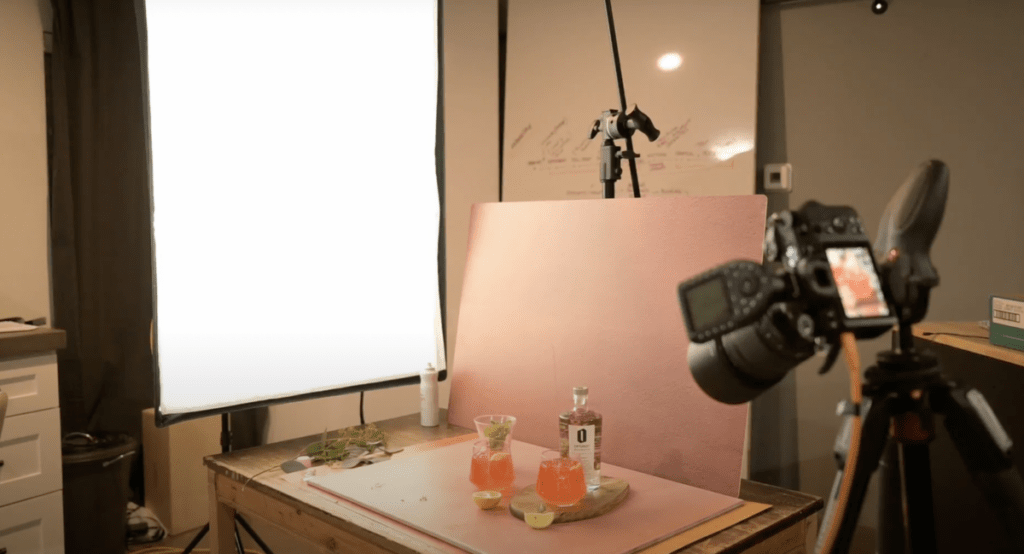
Hard light is fun to play with because it creates a mood. But it also creates an intense spot on your glassware because it’s a small light source. First thought is that this little spot isn’t highly desirable. But when it comes to reflections this is a super easy thing to clean up in editing in comparison to large difficult to edit-out reflections.
I like to use the healing brush tool in Lightroom, Photoshop or Capture One to quickly get rid of that little spot and no one is the wiser.
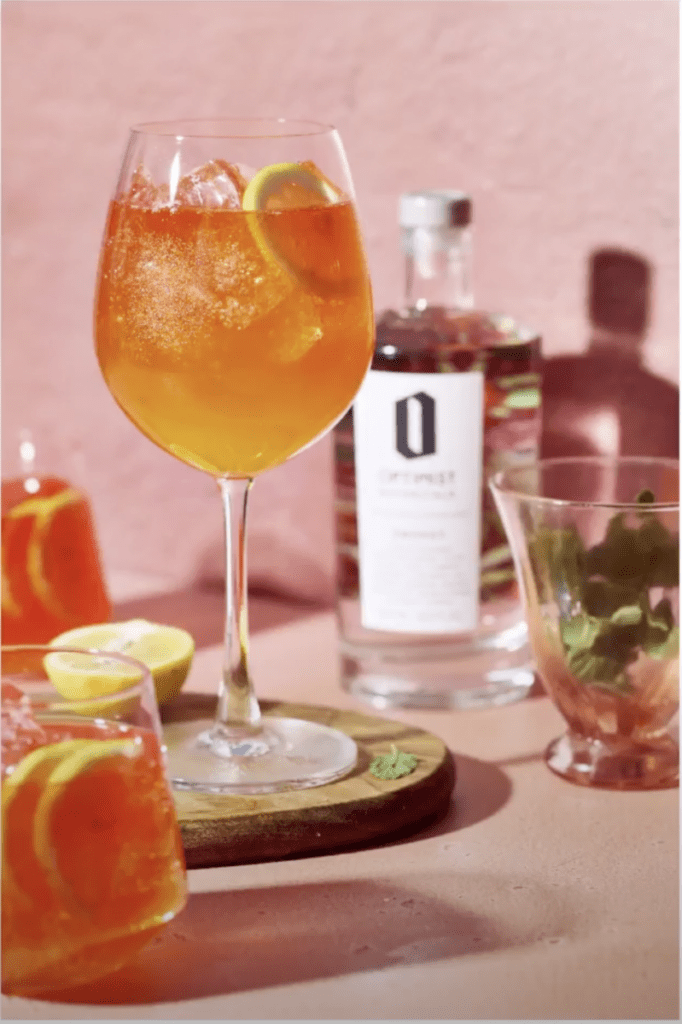
Hard light also creates a really dramatic look and an opportunity for shadow play. Like you see here, shadows can be a subject inside your composition creating leading lines!
If you’re looking for more composition tips, head to my Composition playlist.
Now it’s your turn!
Hopefully one or both of these techniques has you excited to break out the glassware and start experimenting. If you’re in need of inspiration for drinks photography, I find these books especially helpful for dreaming ideas of cocktails.
- Death & Co Welcome Home: A Cocktail Recipe Book
- Twist: Your Guide to Creating Inspired Craft Cocktails
- Cocktails: Modern Favorites to Make at Home
Taking time to study great photographs of drinks helps to strengthen your eye and creates inspiration for you to take your beverage photos to the next level.
And don’t forget to check out last week’s post about how to make your own fake ice at home!


