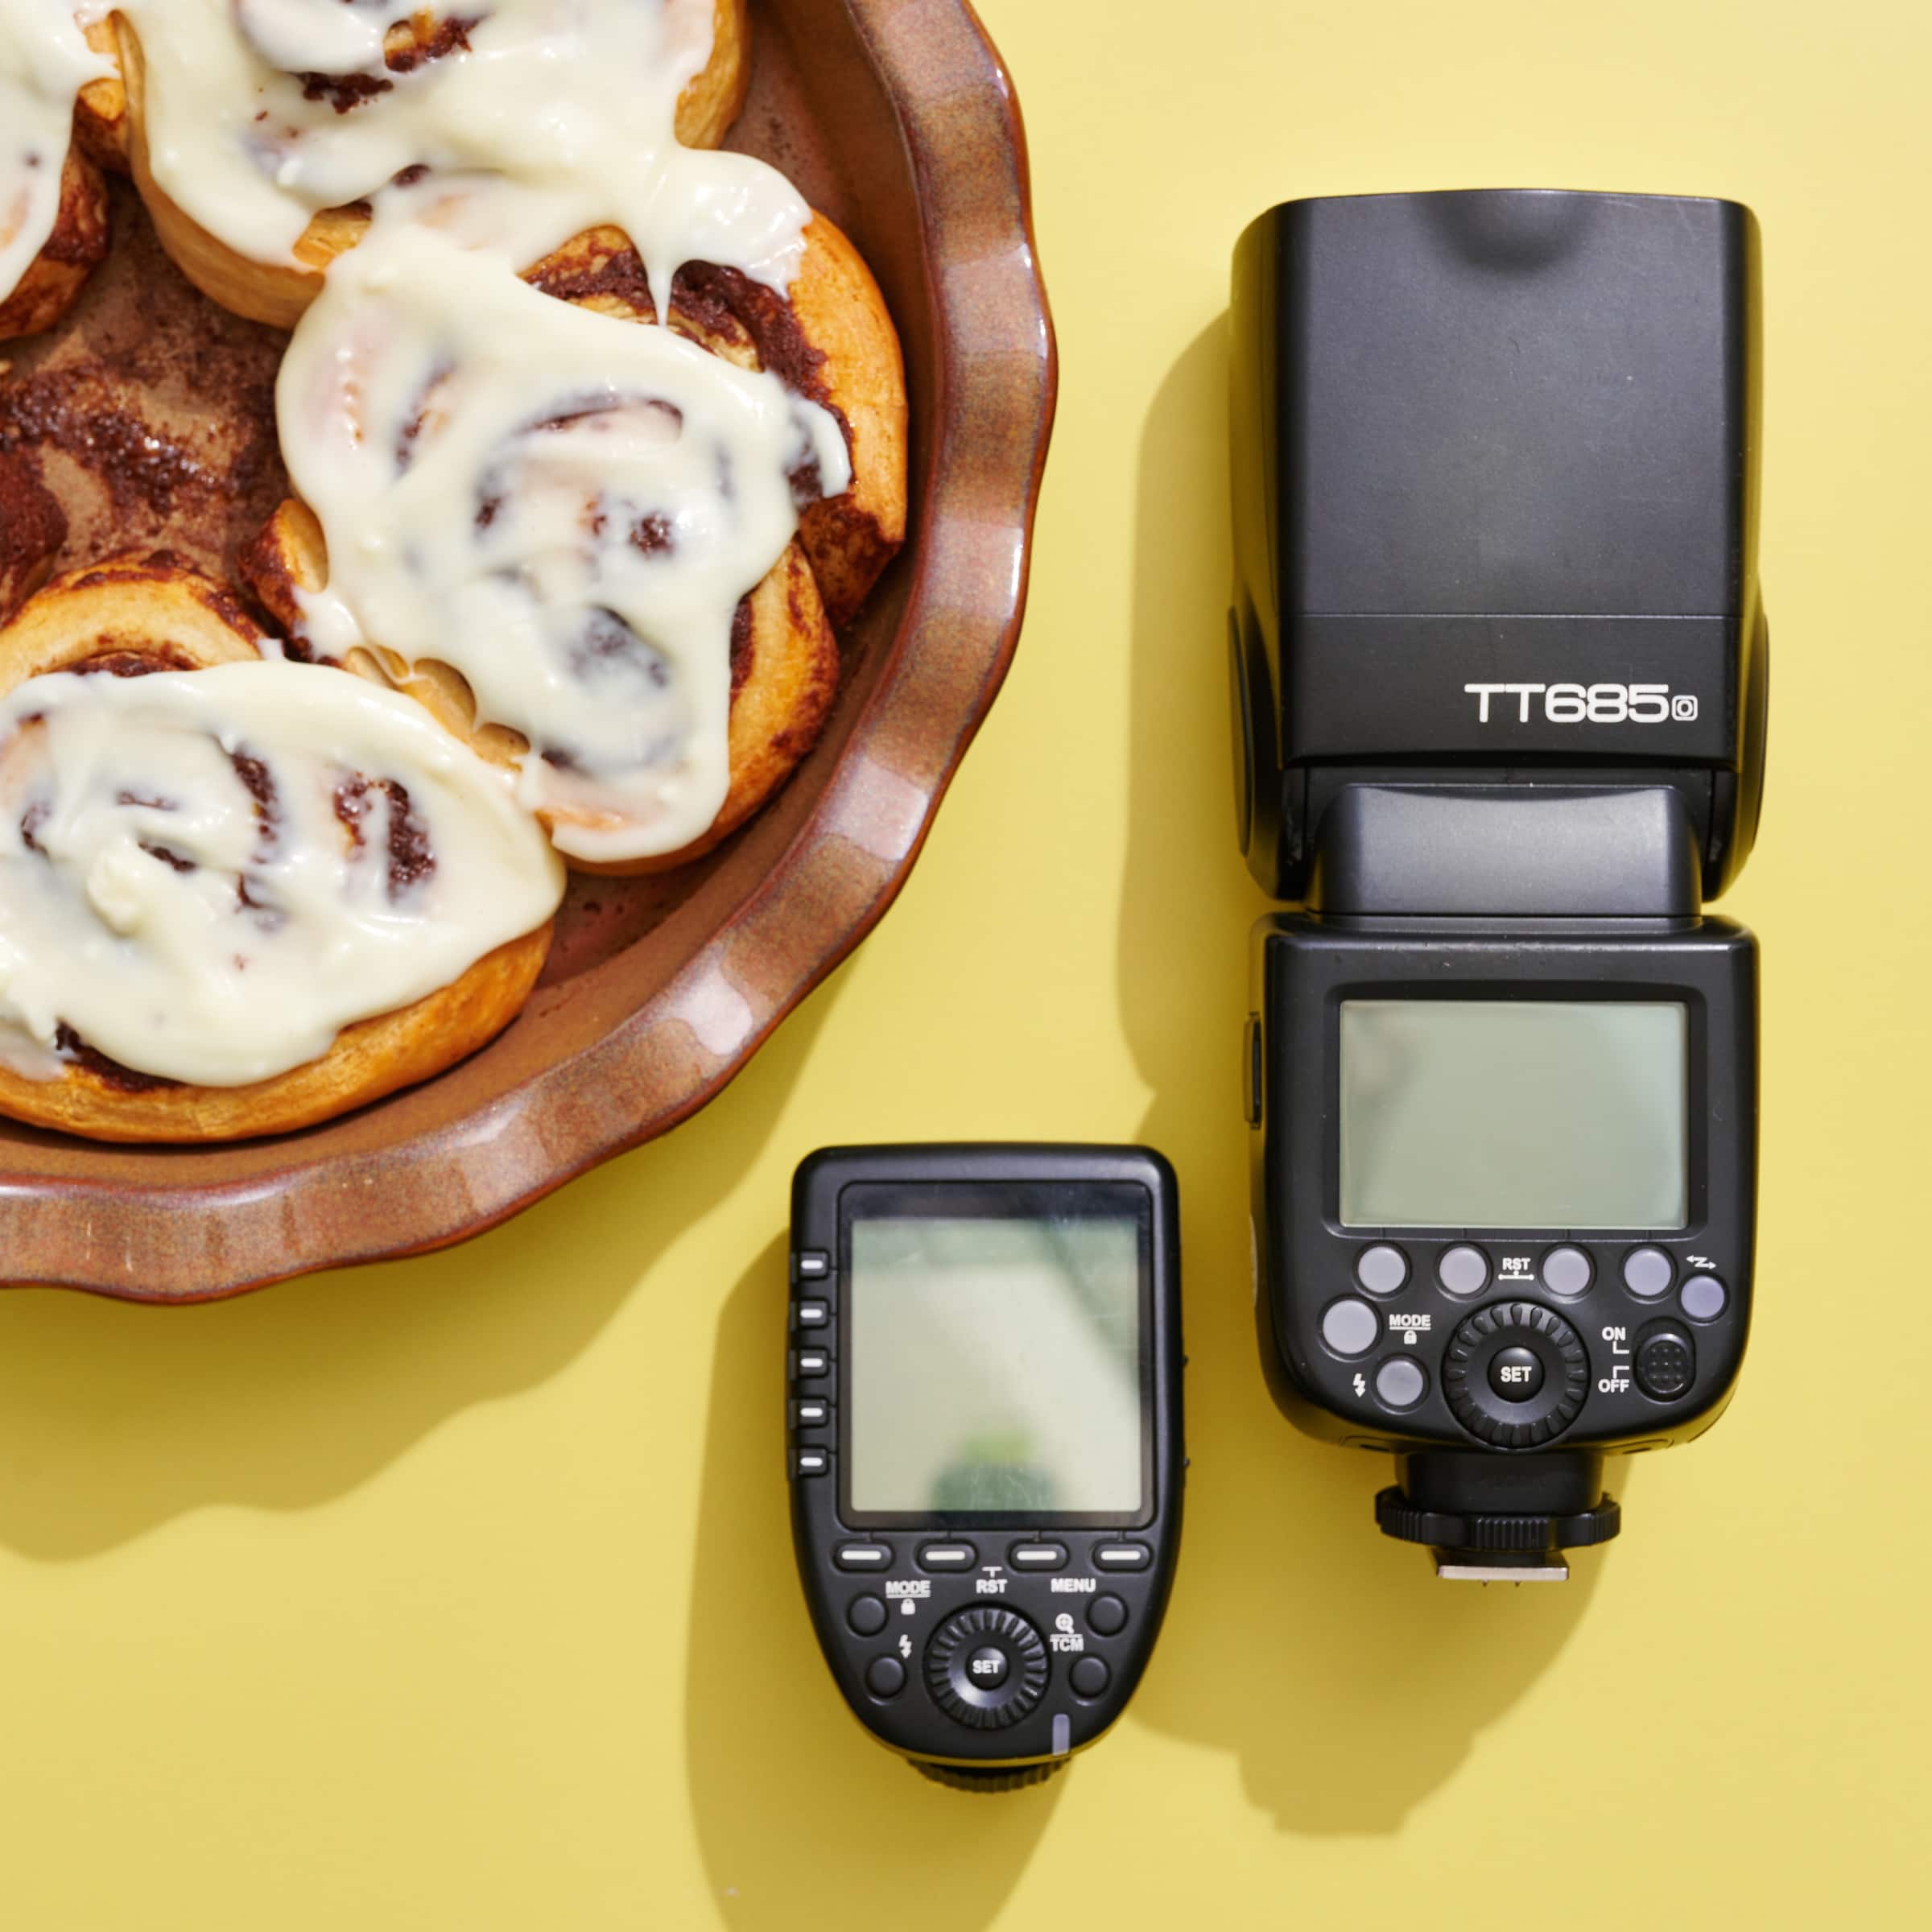
Have you ever struggled with uneven lighting when shooting flat lay photography? I want to show you how I use the Gradient Mask tool in Capture One to fix this issue for this final image from a recent Dolly Parton-themed photoshoot.
This is part one of a three-part series exploring Capture One. We’ll review the tools it offers that are especially helpful to food photographers. Part two will dig into the Overlay Tools. Part three is dedicated to Capture One Live and how it helps me collaborate with remote clients for photoshoots.
Masks
Masks are a favorite editing tool among food photographers. They are similar to the kind of mask you put on your face. Like covering your whole face with a Halloween mask. Or wearing a sleep mask at night to cover your eyes.
Similarly, we can lay a mask on top of our image and only impact the image where the mask has been placed. This gives us more refined control over the different areas of our images.
For example, in flat lay images like the one below the light is positioned on one side of the frame making it brighter along one edge and darker along the opposite edge. You can make adjustments to your lighting like working with a larger modifier or adding a large v-flat to the bottom side to bounce in some fill light or add another light source. But, if you’re limited in your gear, you can just add a mask in editing to the area you want brightened to create more even lighting across the image.
Here you can see the before without the mask and the after with the mask if you hit the ‘play’ button.
Gradient Mask
A gradient mask is like laying a rectangular sheet over your image and moving it to the part of the image you want to impact. But, what makes it “gradient” is that the edge of the mask has a subtle fade. This helps to make the edits and changes look natural and undetectable to most viewers. To better understand this concept, let’s walk through a tangible example together.
Applying a Gradient Mask
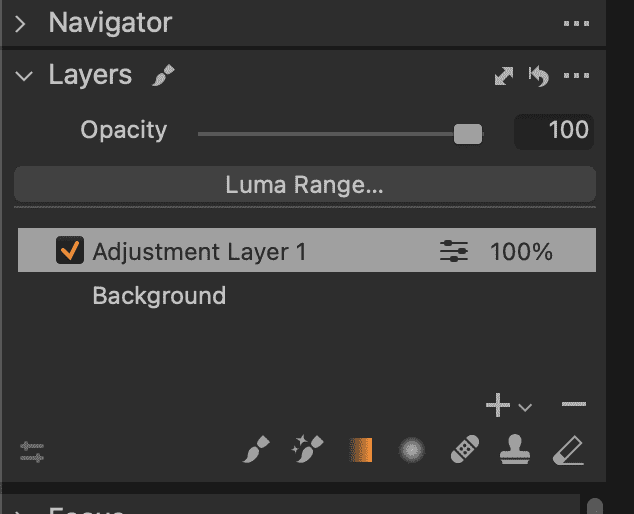
To apply a gradient mask, first, navigate to the Layers panel in Capture One.
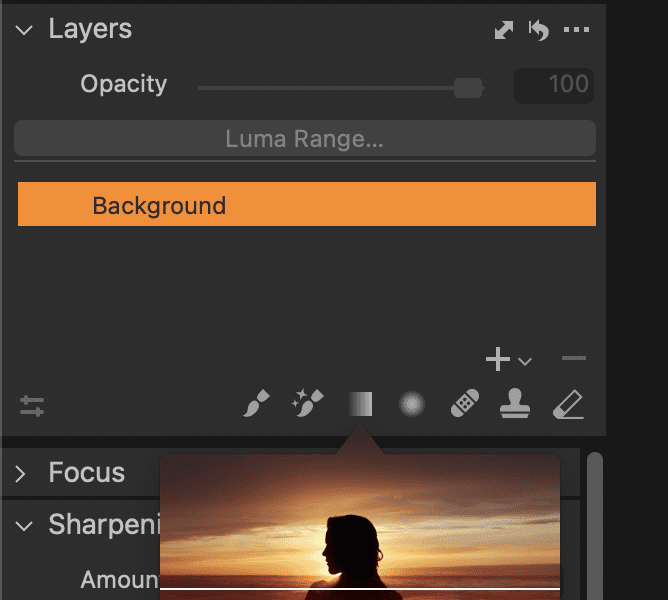
Then select “Draw Linear Gradient Mask”.
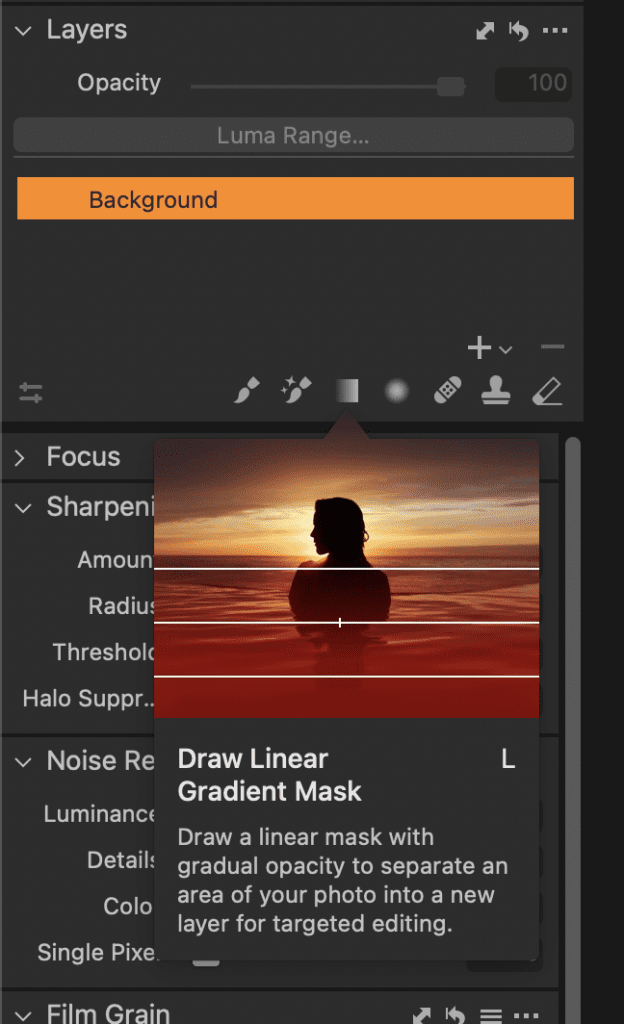
This turns your cursor into the Linear Gradient Mask tool. Move your cursor to the image and you’ll see it’s no longer an arrow tool, but a “+” shape.
Next, click and hold the cursor in a spot in the image and you’ll see three lines appear along with a bright red color overlaying a portion of the image. This red area represents the mask. Anything that’s not red will be unaffected by any adjustments you make in the mask layer.
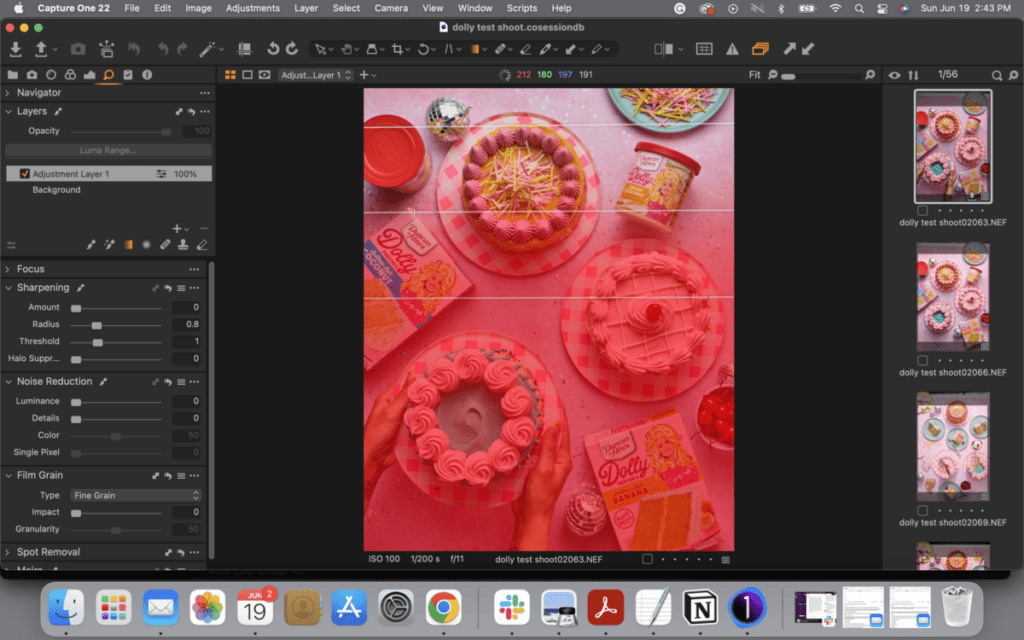
You’ll also notice in the layers panel that it has added an adjustment layer on top of your background image. Imagine the background is like a bed and the adjustment layer is a sheet on top of the bed.
Change the Color of Your Mask
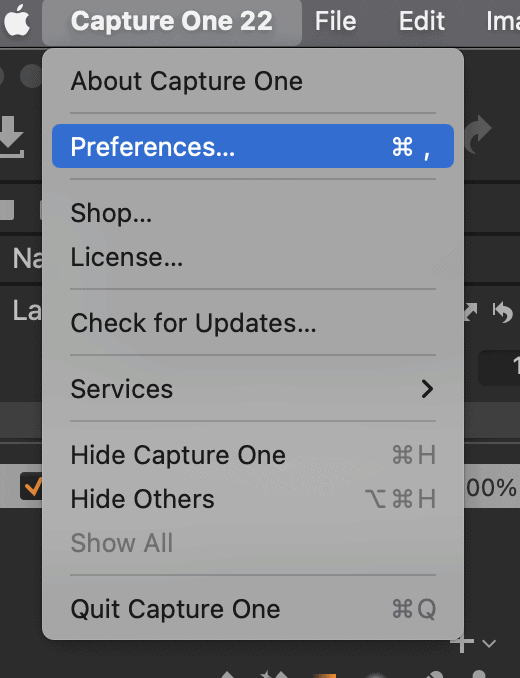
If your mask color is the same as your subject is may be hard to see what the mask is covering. For example, if your mask color is red but you’re editing strawberries you will want to change the color of the mask to make it more visible. To change the color you can go to Preferences:
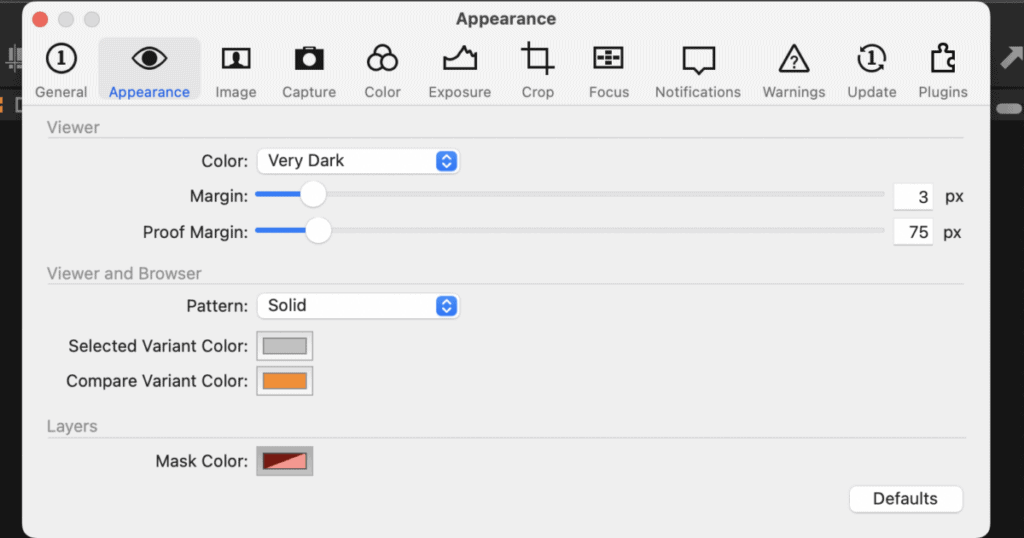
and then go to the Appearance menu and under Layers change the Mask Color:
Positioning a Gradient Mask
Going back to the three lines, you’ll also notice that there is a fade from the original image to the red area, which is the gradient. If you move your cursor to the bottom line near the red area of the mask and you pull the lines further apart, the gradient is more gradual.
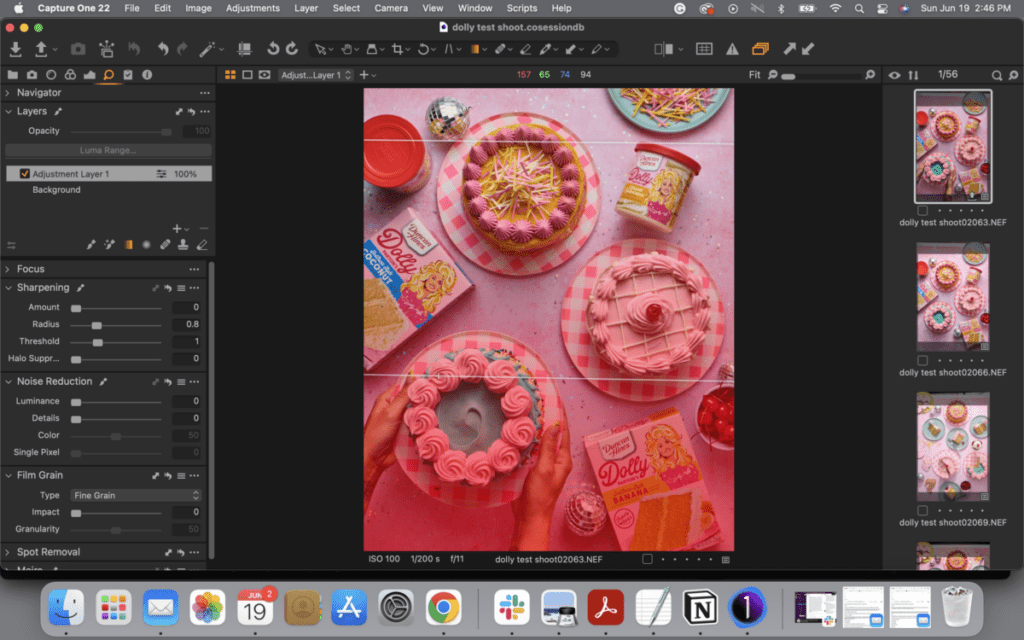
If you move the lines closer together it’s a more immediate transition into the mask.
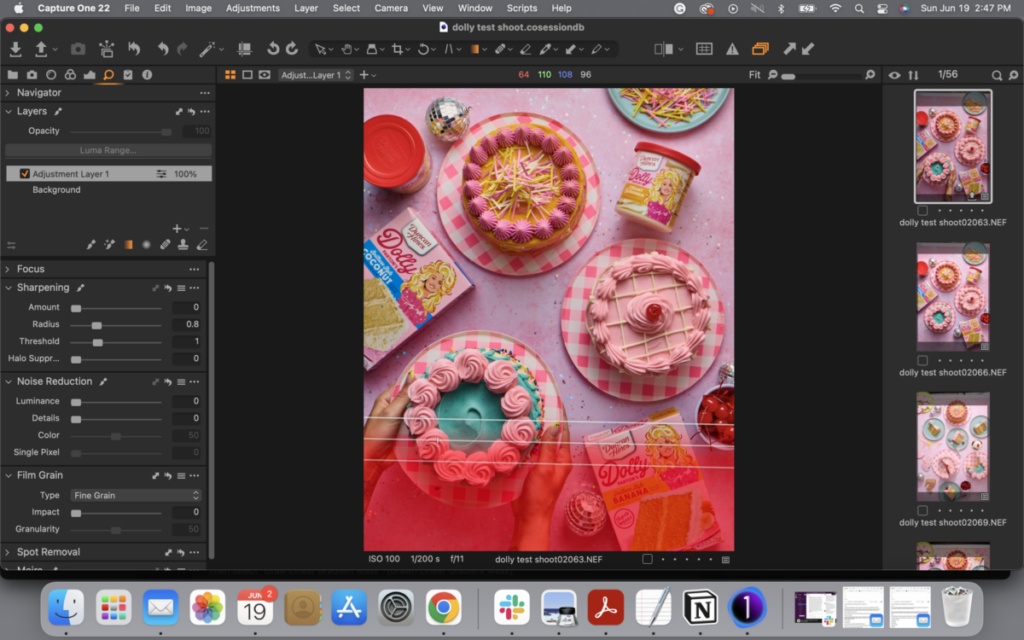
There is no set standard for the amount of gradient to use for a gradient mask. The choice of gradient is based on personal taste. For this particular image, I wanted a subtle fade so that it isn’t obvious that a mask has been applied.
You can also rotate the angle of the mask by moving your cursor toward the center point of the three lines and you’ll see a rotation symbol appear. You can drag it in a particular direction to rotate the mask.
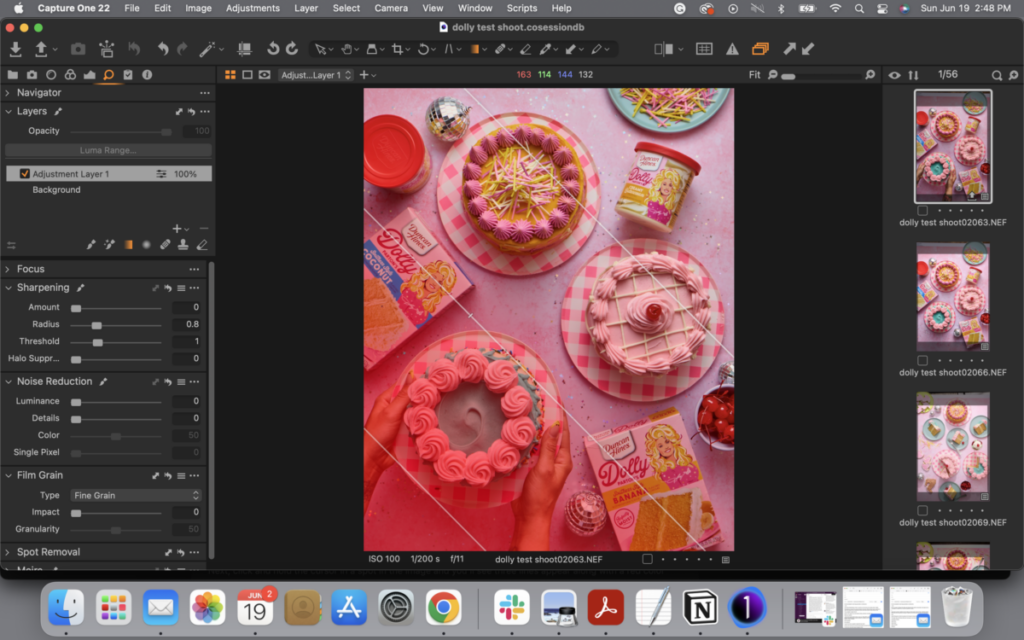
You can also move the mask around once you have the gradient and angle set by moving your cursor around toward the center point of the three lines until the plus with arrows symbol appears.
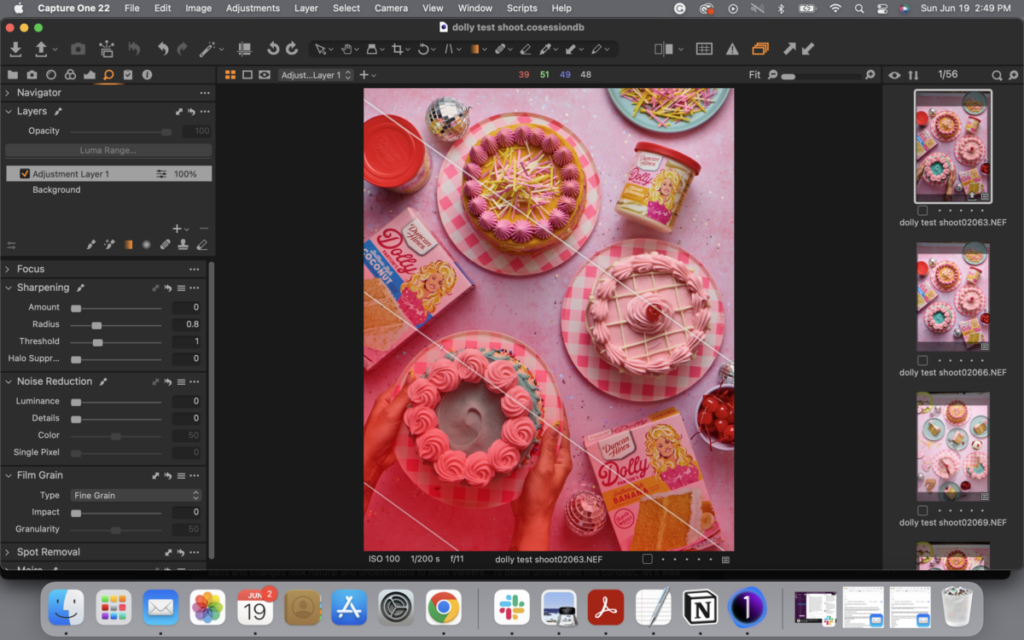
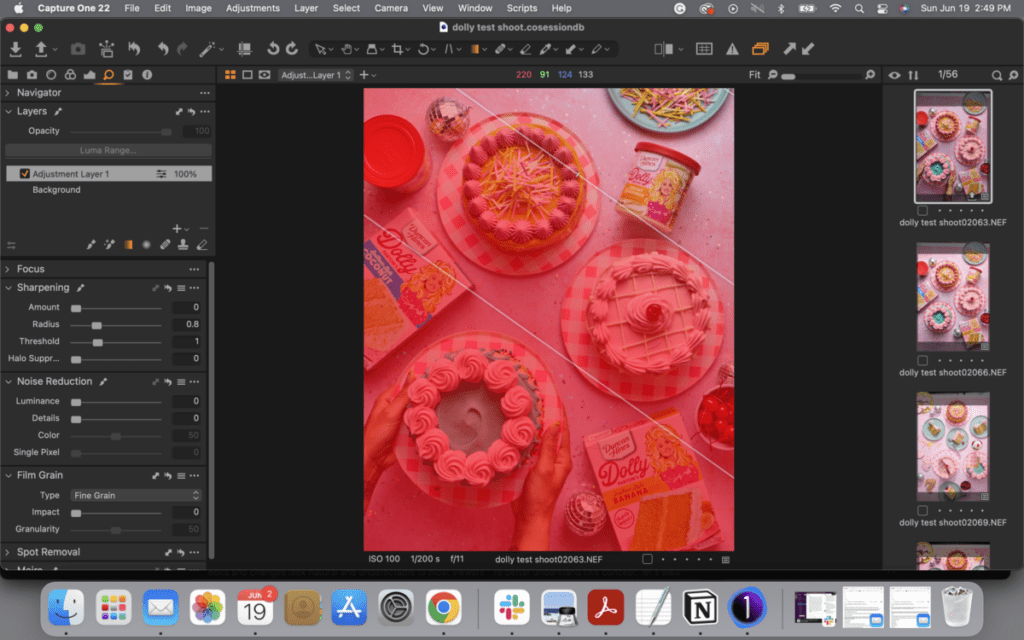
If these steps feel a little (or a lot) awkward that’s normal. Practice dragging the mask around, adjusting the amount of gradient and rotating it until you feel more control.
Making Edits in an Adjustment Layer
When you are no longer holding the mask, the red color will disappear, but the mask layer is still there. It’s helpful for the red to go away so that when you start to make edits to the mask you can see how it impacts the image.
Once the mask is in place, make sure the mask layer is selected in the layers panel. This ensures that the edits you’re making are to the adjustment layer and not to the background image.
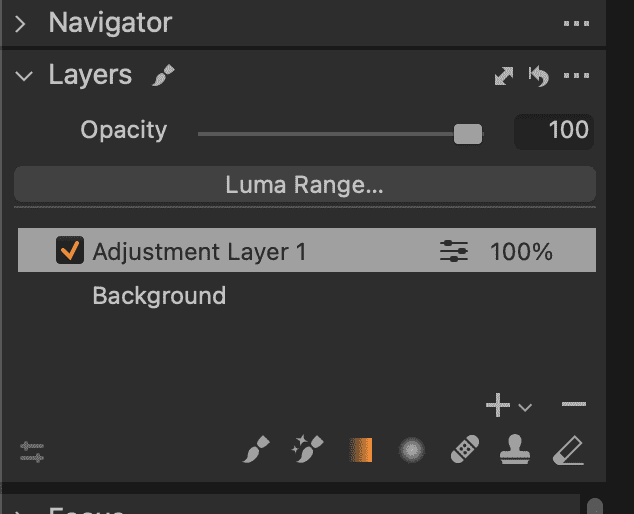
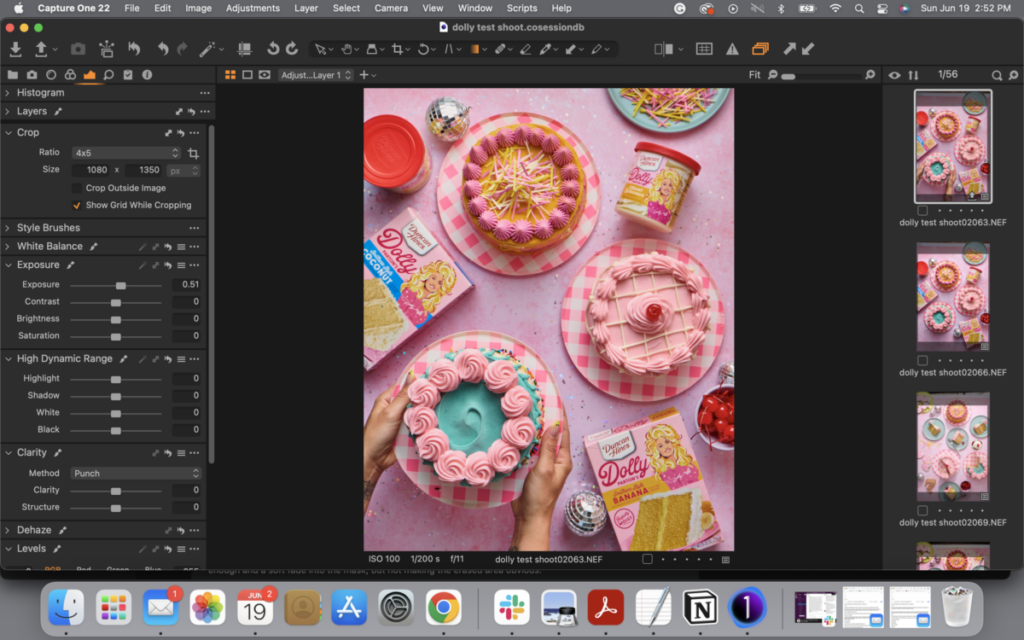
From there, you can make any edit to that adjustment layer.
For example, in this image, it’s a bit more shadowy in the lower left corner and I want a more even exposure across the image. So I navigate to the exposure panel and increase the exposure a little bit to brighten only that lower left area where the mask is present. But the upper right area where there is no mask is left unaffected.
I can also affect other changes by adjusting other tools. For example, the exposure increase helped a bit, but I want to further lighten just the shadows in the area where the mask is. I can move the shadows slider under “High Dynamic Range” toward the right and brighten them further.
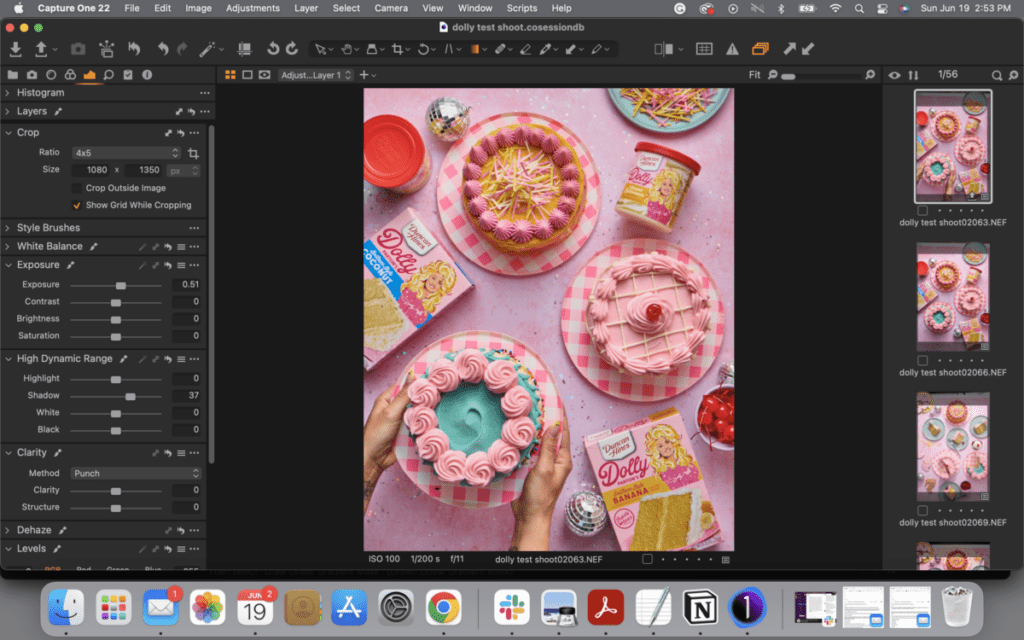
The awesome part about the way that masks work in Capture One is that you can use any editing tool on the adjustment layer. In other editing softwares like Lightroom, you can only select from a limited number of tools to use within the mask. There is no limit in Capture One.
Erasing Part of Your Mask
What if you add a gradient mask and it’s doing what you want, but there’s just one spot that you don’t want it to affect? That’s when the erase tool comes into play.
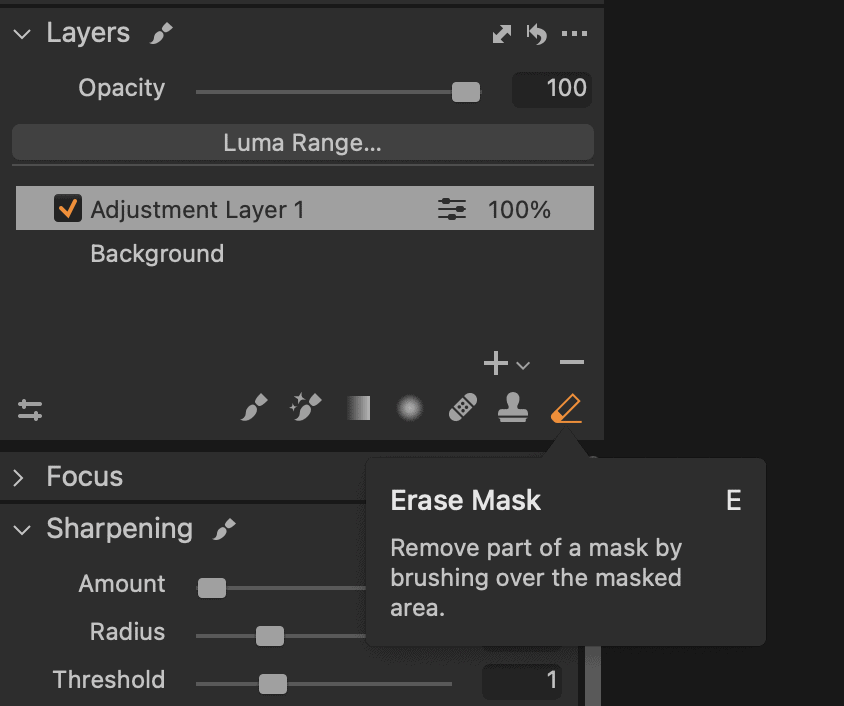
In this image, I like the gradient overall, but I don’t want to brighten the lip of the plate that’s facing the direction of the light. I can select the Erase tool in the layers panel and then apply it like a paintbrush over just the plate to erase the mask in that area.
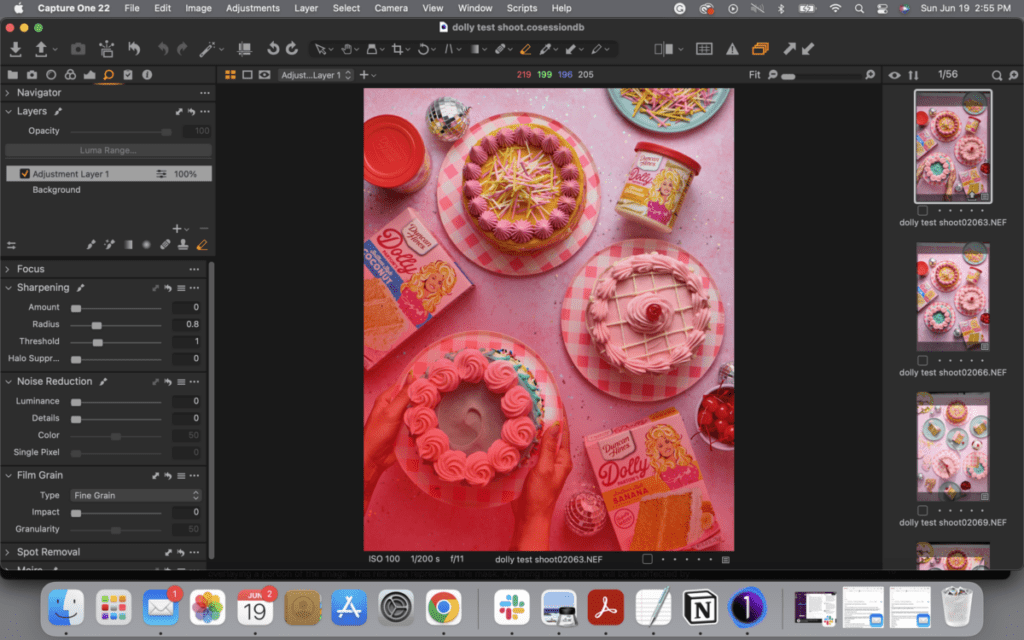
You can also refine the brush by holding down “Control” and clicking to open a menu of options including adjusting the size of the brush, the softness, the opacity and the flow.
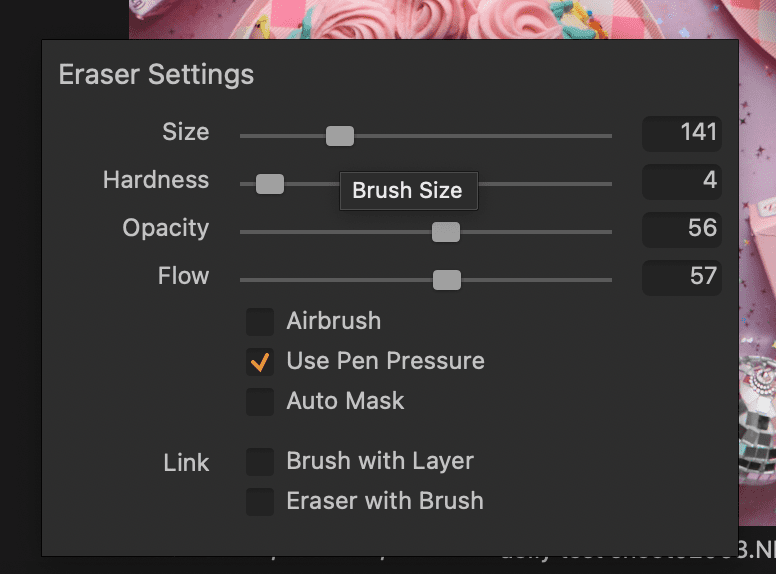
The flow is like an ink pen. Is it a pen that flows quickly and puts down a lot of pigment at once, or does it flow more slowly and allow you to build up the ink.
I prefer to select a brush that’s roughly the size of the area I’m looking to clear, with a soft brush, at medium opacity and medium flow. This allows me to start erasing little by little, moving back over the area until it’s erased enough and a soft fade into the mask, but not making the erased area obvious.
A Shortcut for Brush Sizing
One favorite shortcut that I use a lot when working with the erase tool or any brush tools is that hitting the left or right bracket keys will make your brush larger or smaller. Hitting the “[” key makes your brush smaller and the “]” key makes it larger. This helps to adjust the size of your brush quickly as you’re working in order to refine the brush for smaller areas and increase it for larger areas.
Adjustment Layer Opacity
My other favorite feature is that you can adjust the opacity of an adjustment layer. This allows for additional control and further subtlety in the effect of your masks. For example, at 100%, the exposure adjustment I made is in full effect. But, if I decrease the opacity to 50%, it reduces the impact of the mask by 50%, allowing more of the original image properties to show through.
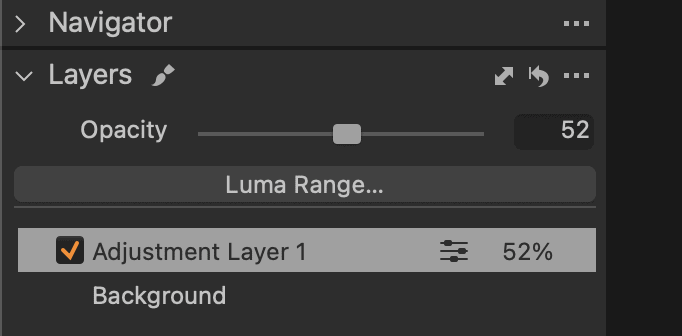
Just like putting tracing paper over a picture allows you to see more of the underneath image come through, as opposed to laying a standard solid, fully opaque, piece of paper over the same image and nothing shows through.
It’s like seasoning to taste and an added level of control in your edits.
Navigating Between Layers
If you want to go back to editing the base layer, the original image, go back to the layers panel and move the selection to the background.
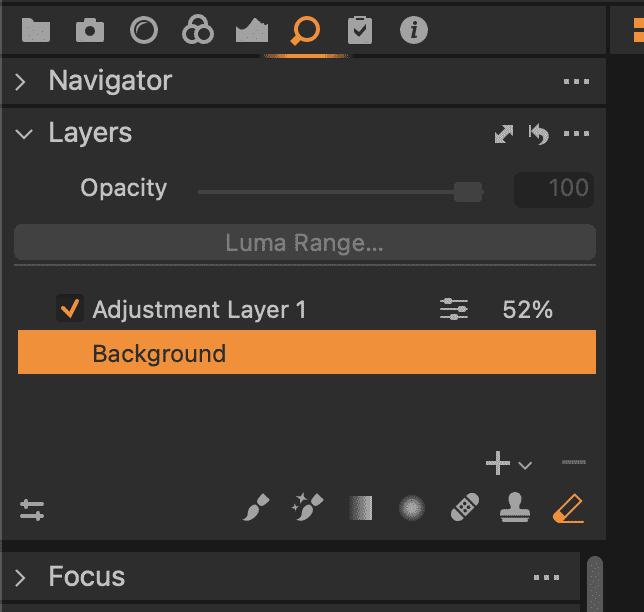
You can also add more than one layer to an image. Go back to the layers panel and you can select the + sign to add a new adjustment layer. You can add another gradient mask or one of the other mask options like the Draw Mask, Magic Brush, Radial Gradient Mask, Healing Mask, or Clone Mask.
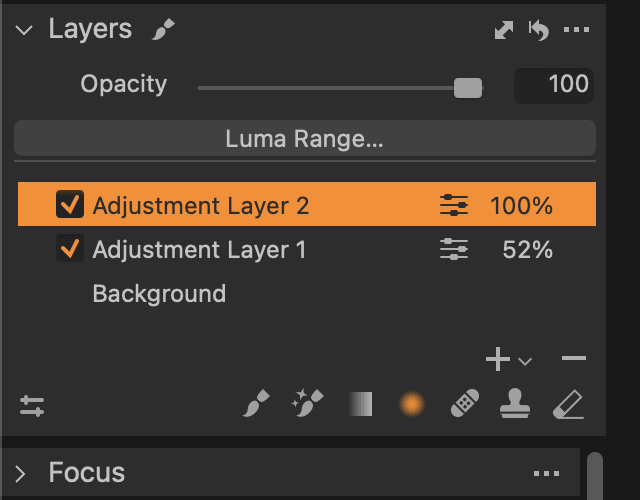
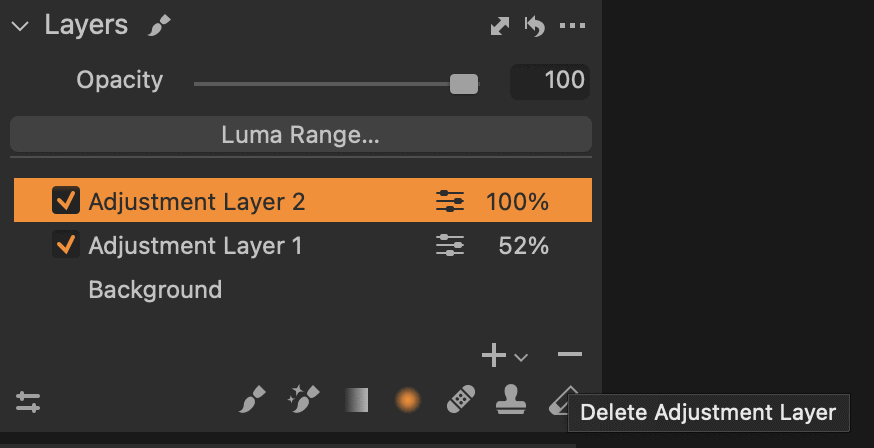
If you add a layer and decide you want to get rid of it completely, select the “-” to delete the highlighted adjustment layer.
Your Turn
That’s my little secret for editing flat lay images! The addition of a single gradient mask layer on this image helped to boost the brightness and even out the exposure for this flat lay image.
Before & After! A quick easy fix!
Now it’s your turn! If you don’t already have Capture One and aren’t sure if you want to commit, you can download a trial version for 30 days to experiment.
If this is your first time using Capture One, you can watch this getting started video on YouTube to help you navigate the import, capture, and basic editing features.
Next up, we’re exploring the overlay feature in Capture One. If you’ve ever struggled with composition in your food photography, this tool is going to save you so much time.


