Capture One Live makes it easy to work with clients who can’t join you on set for a photoshoot. I’m going to show you why it’s my number one favorite feature in Capture One, how I use it to help improve client satisfaction and how it helps to prevent re-shoots.
The Move to Remote Photoshoots
The pandemic shifted the way a lot of photographers worked with clients. Instead of having everyone on set physically together, it became normal to do shoots “remotely”. The photographer and a handful of essential people like the stylist would be on set while the client and other stakeholders would participate from their own homes or offices.
This shift made things safer in terms of minimizing social contact. It also reduced travel expenses and production expenses like craft services (industry lingo for catering to feed everyone on a long shoot day).
It’s also more convenient for busy clients who don’t want to commute or travel to a studio location. And for people like me who aren’t based in a major city, it makes it possible to work with clients anywhere in the world. I still continue to do remote work regularly and have a number of clients who I have never met in person.
But, this shift also introduced new challenges in terms of communication.
When the client is on set they can see what’s happening, suggest changes, and add feedback in real-time.
For example, we shot a small cookbook that had some very specific dietary considerations and styling needs because of the agency funding the project.
The client team included a Registered Dietician and the Creative Director. They both had different things they were paying attention to relevant to their role in the cookbook.
Like when we wanted to add garnish to something, we were clearing it with the dietician because there were strict rules in terms of what could be added nutritionally.
When we were lining up the composition and swapping out props, the Creative Director’s eyes were on it.
And then when we felt like we had the final image, I would invite everyone to the monitor for final approvals. I wanted them to confirm that we “got the shot” before clearing the set and getting ready for the next recipe. That was all done in person because they were on set with me.
So how does this work for remote photoshoots when the client is not on set? That’s where Capture One Live comes into play. You can send a link to anyone, anywhere in the world to access your Capture One software and see the images as they’re being captured, just like they’re on set with you.
What You Need to Set Up Capture One Live
Capture One Live is only available in Capture One version 22 and later. You receive five free sessions with your basic package. Beyond that it’s a $10 per month subscription for unlimited use.
You will also need to be set up for tethered shooting so that you are capturing your images to the computer as you shoot. For help on getting started visit our Tethered Shooting Basics blog post.
Activating and Using Capture One Live
When you open up Capture One look in the upper left area of the screen in the toolbar for the “live” icon.
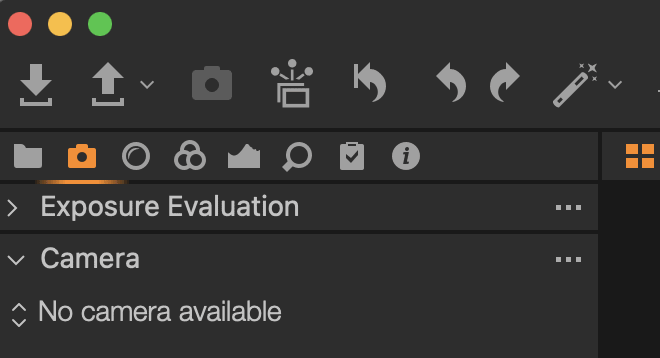
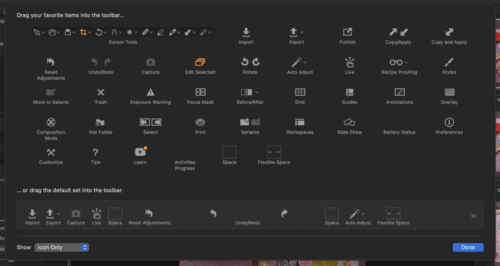
If it’s not there, you can add the “live” feature to your top toolbar by right clicking in the toolbar area and hitting “customize”. From there you’ll see all the various tools that can be added to your toolbar and navigation area. Drag “live” from the tools area into the toolbar so you can quickly access it in the future.
Once it’s in your toolbar, click the “live” icon to bring up a menu of options.
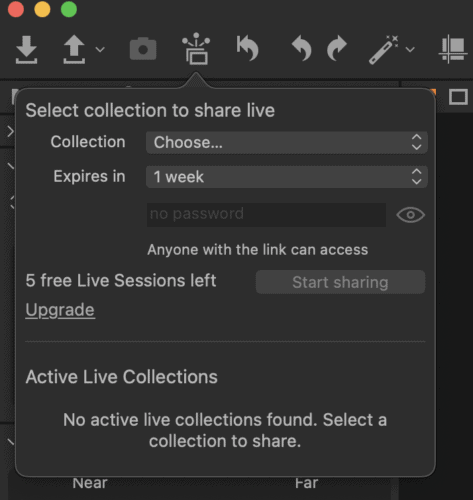
First, choose the collection you want them to view by selecting a folder. To understand this option, it helps to understand the Capture One file storage structure.
When you start a new session in Capture One it automatically creates four folders for you.
- There is the Capture folder where all of the images go as soon as you hit the shutter button.
- There is a Selects folder where you can move images to once you’ve decided they’re going to be kept. For example, if we’re shooting a cake and the fourth one in the series is the best, I move that one to the Selects folder. You can drag the image there or hit CMD + J on your keyboard to move it from Capture to Selects.
- The Output folder is where exported files go.
- The Trash is stuff you plan to delete. My test shots and imperfect shots all end up in the Trash.
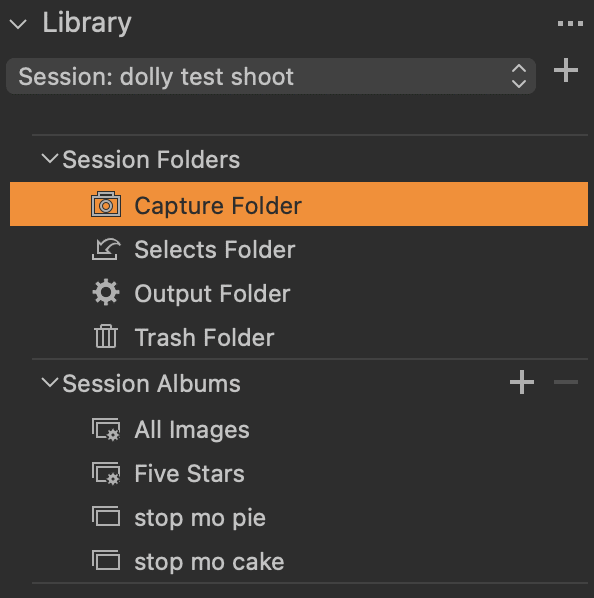
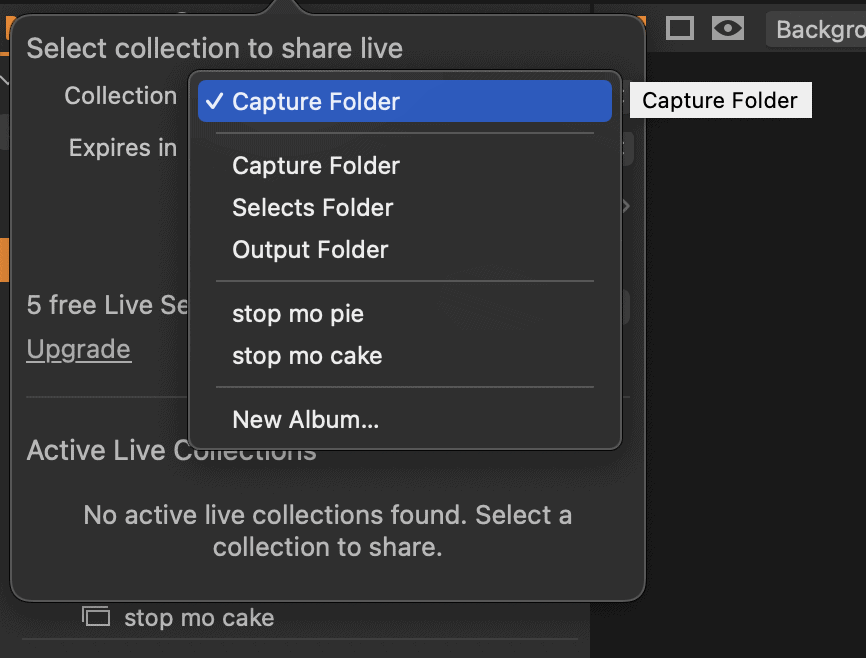
When prompted to choose a collection to share, I typically share my Capture folder so the client can see the images coming into the computer as they’re being captured. During a client shoot I typically hold off on moving images to the Selects folder and instead utilize the star rating system, which we’ll dig into further later in the post.
Next set the amount of time you want the link to be available. This will depend on the length of your shoot. If it’s a single day then one day is fine. But, if it’s a multi day shoot you might want to select a week or more.
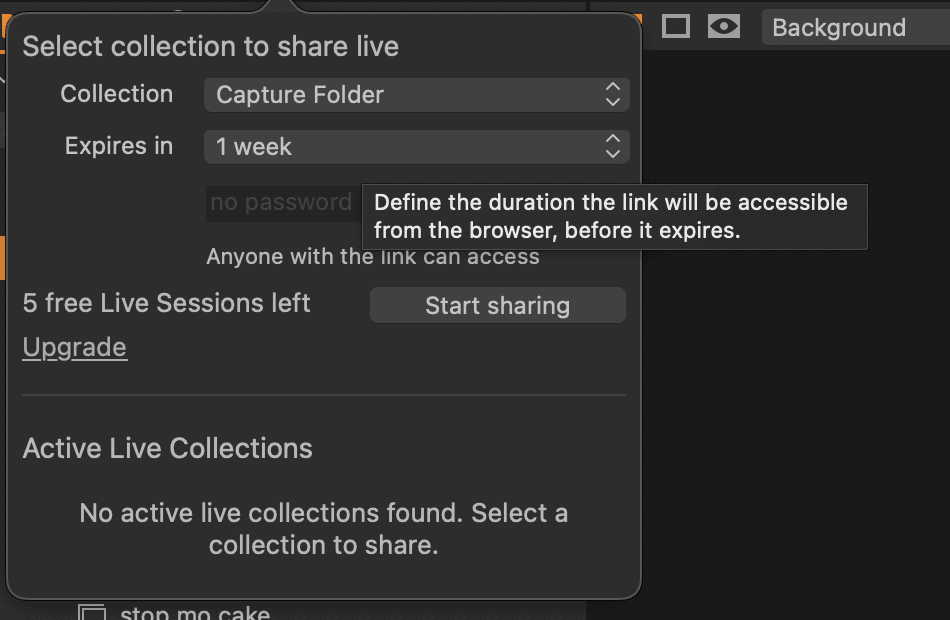
Next you can set a password if you like.
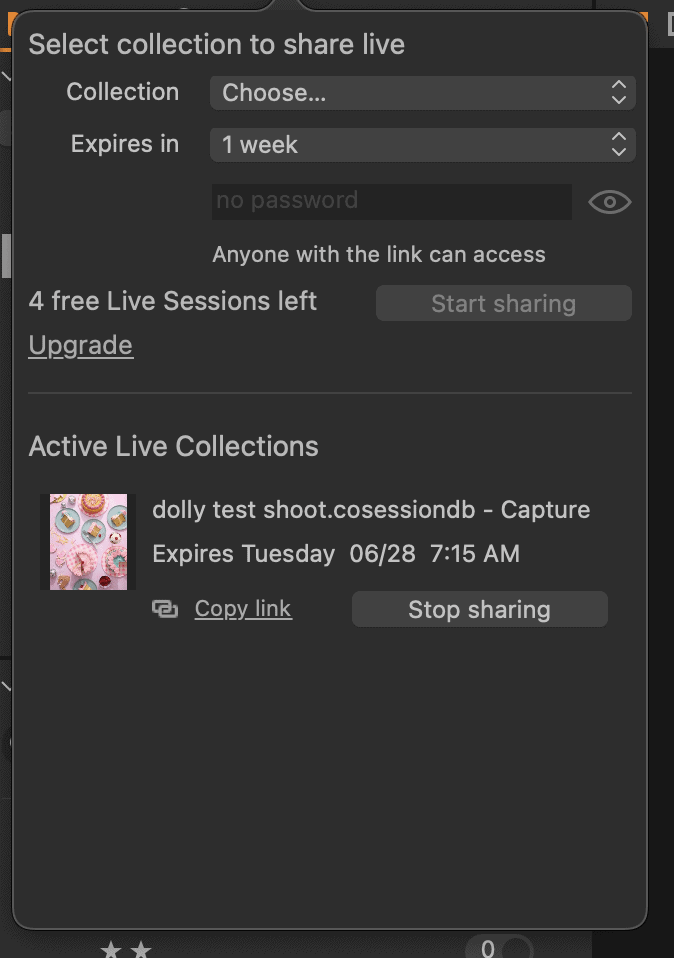
And then you’re ready to go live! Select “start sharing” and it will generate a link that you can copy and paste and send to your client.
What the Client Sees
Your client can use the link you send them to access the session folder from anywhere in the world as long as they have a connection to the internet. It’s both desktop and mobile friendly.
Here is the gallery view of what the client will see when they open your link.
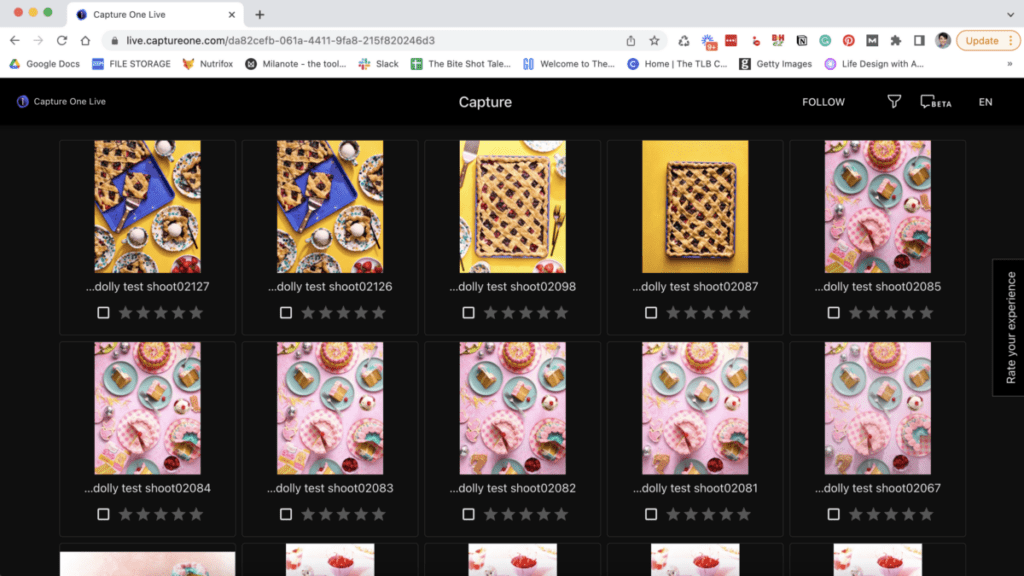
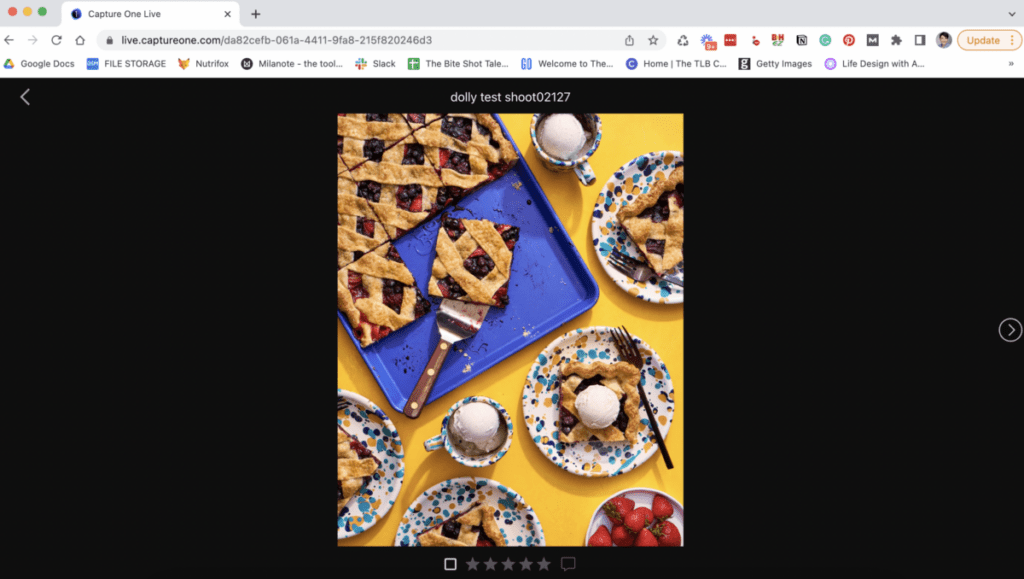
They can click on any image to see it larger on the screen.
Rating Images
Clients can also rate and comment on photos through this application.
For example, I like to use the star rating system. I tell the client at the start of the shoot to mark any images they like with a five star rating and any they don’t like to leave unrated. The star rating options are at the bottom of the screen and you simply click on the stars to increase the rating from 1 star to 5 star.

I try to keep the system as simple as possible and not assigning a ton of different star ratings. In my mind a photo is either worth keeping or it’s not. That’s why I stick with zero stars or five stars to eliminate confusion. But you can pick a system that works best for you and the kinds of clients you serve. The purpose of this feature is to help you remember once you get to editing which images the client liked best.
Perhaps you’re into color coding instead of star ratings. The client can click on the little box to the left of the stars and select a color rating instead. Again, you’ll want to define with the client at the beginning of the shoot what you want the colors to mean. For example, maybe red is “trash”, yellow is “maybe” and green is “keep”.

Be Careful with the Comments Feature
Clients can also leave comments on photos by clicking the comment box to the right of the stars.

It will open a comment box where they can type in any specific notes or edits. However, I use this feature on a limited basis because it can create some inefficient communications on shoot day if relied upon for all communications.
If the client wants to provide feedback about an adjustment that needs to be made to the image while on set, such as composition or the way the food is styled, I like to have the client talk with me on the phone or on Zoom so we can make the change right away.
For example, we were shooting a cake recently and the client wanted us to add some more berries to the top. Had they left a comment with that note, I would not have seen it during the shoot. But since she was available on Zoom with us, she was able to speak up and tell us that note in the moment so we could quickly adjust and get the shot.
The only time that the comment box makes sense to me is when the note is specific to the post processing of the image. For example, if this slab pie shot if the client wanted more green undertones in the blue tray, that would be something that would be done after the shoot in editing and retouching.
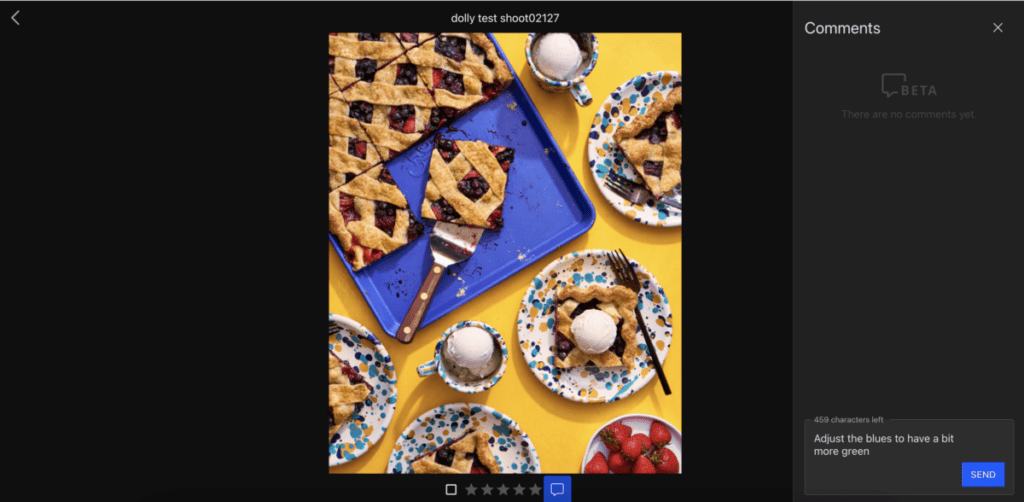
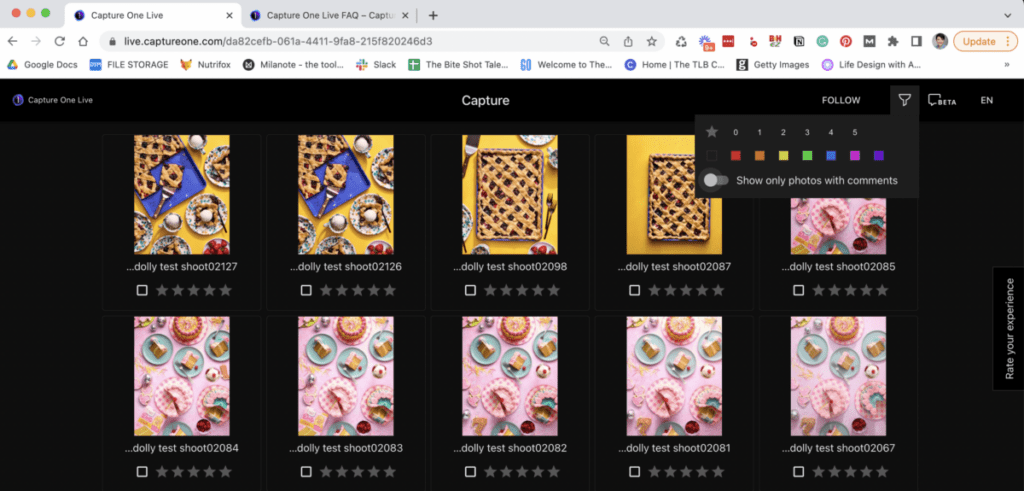
If you decide to use the comment feature on Capture One, it’s important also to note that these comments do not sync to your Capture One software. They are only visible in the Capture One Live window. To see the images that contain comments go back to the gallery view and hit the “sort” button and turn on “show only photos with comments”.
Tools for Client Satisfaction
Tools like Capture One Live help photographers like me to work from the comfort of a home studio while serving clients across the country. You don’t need to live in a major city to build a full-time photography business serving brands. You simply need a solid plan for communicating on shoot day with your clients to help ensure their satisfaction.


