When people ask about ways to streamline their shooting workflow for food photography, I say one word: tethering.
Tethering is the ability to connect your camera to a computer in order to capture the images directly to a hard drive and view them instantly with tethering software on your computer’s monitor.
Let’s dive into the specific features of tethering and why it’s so powerful for streamlining your photoshoot workflow.
Why Tethering Rocks
Nailed the Shot
Have you ever captured an image, and checked it out on the LCD screen thinking it looked properly exposed and in focus only to find later in editing that it was totally off?
Those little LCD screens on the backs of cameras are small, so it’s easy to miss details!
Shooting tethered solves that problem.
When tethering, the image is immediately going into your computer and you can see it on a larger screen where it’s easier and quicker to visually check the accuracy.
Collaborating with Team Members
if you’re ever working together with other people on a shoot such as stylists, assistants or clients, shooting tethered makes it easier for everyone to view images together.
Collaborating is easier and more efficient when everyone can see the images clearly as they’re being captured.
Gone are the days of huddling around the back of the camera.
Remote Photoshoots
Tethering is infinitely helpful when shooting for a client who cannot physically be with you at a shoot.
The most recent cookbook I photographed, Home for the Holidays, was done 100% remotely.
My studio is in Phoenix and the author, Ashley Manila, is based in New York. On shoot days I would text Ashley the day’s schedule and give her a heads up on when to expect to be online. As we were nearing the capture of a hero shot for a dish, I’d text her “almost ready with the next shot” and she would join us on Zoom where I was sharing the screen to my tethering software. She could see the shot, provide real time feedback and we could perfect the shot together.
This takes the guesswork out of shooting with remote clients and ensures that when we clean up a set, we aren’t worried that the client will want changes later. This drastically reduces the number of re-shoots for a project.
The Gear
Cables
The first special piece of equipment that you need in order to connect your camera to your computer is a tethering cable.
I recommend choosing a quality, professional cable like the ones from Tether Tools or Area 51. Theirs are reliable and manufactured specifically for shooting tethered. I especially love the 31’ cable from Area 51. It’s super long for maximum mobility to move around a scene.
Sometimes cheaper cables can become unreliable, especially the longer they get. I have lighting fast transfer speed with the Area 51 cable so that within a second or two of capturing an image on the camera it’s loading in my tethering software. Cheaper cables can sometimes lag.
You will want to purchase a cable that is compatible with your specific camera and computer. The easiest way to figure out the connections and cable you need is by going to the Tether Tools site and entering in your camera’s brand, model, and computer port type. They will then tell you the specific cable that will work with your equipment.
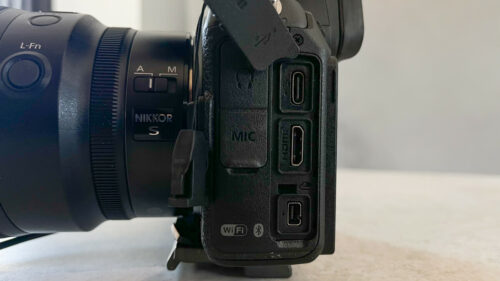
Unsure of which ports you have on your computer? You can use these quick instructions to find out:
Apple
- Go to the Apple Icon in the upper left navigation.
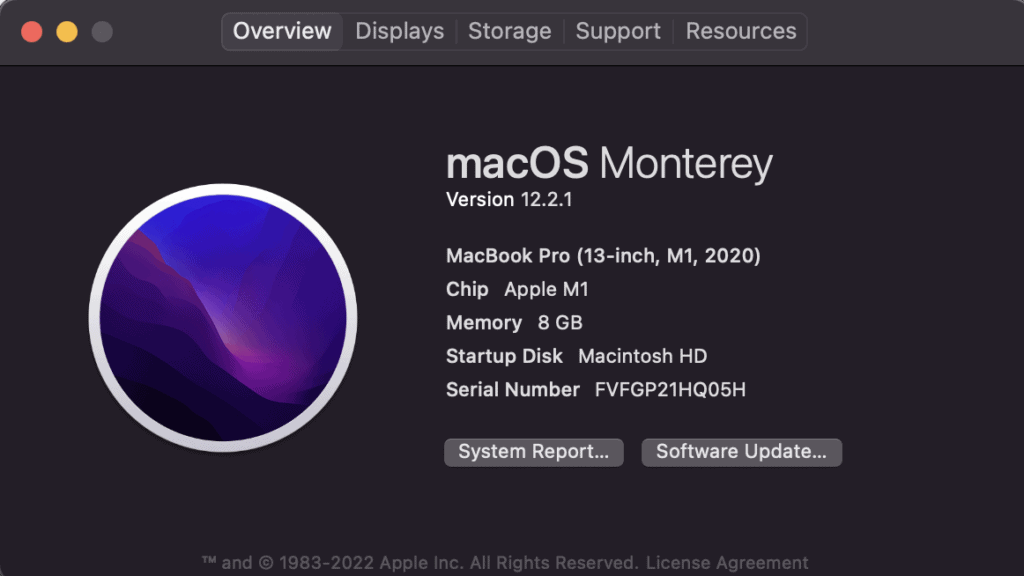
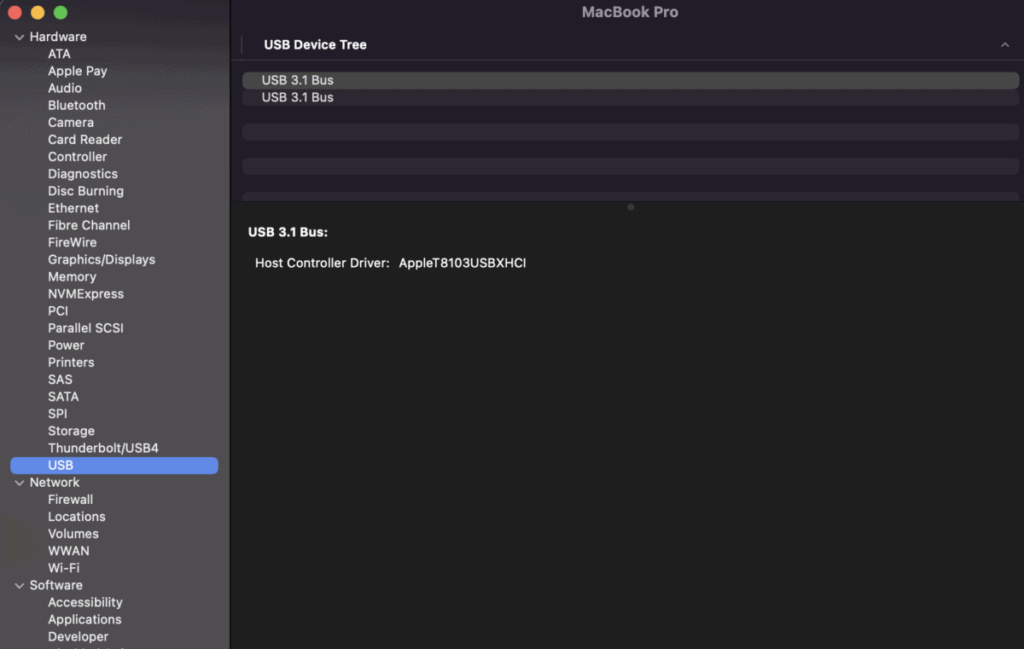
- Then select “About this Mac” and either hit “More Info” or “System Report”. You’ll see a list of system features on the left. Select “USB” and it should list out for you if you have Thunderbolt and will also list the USB connection details such as USB 3.0, 2.0 or USB-C.
PC
- Open the Device Manager.
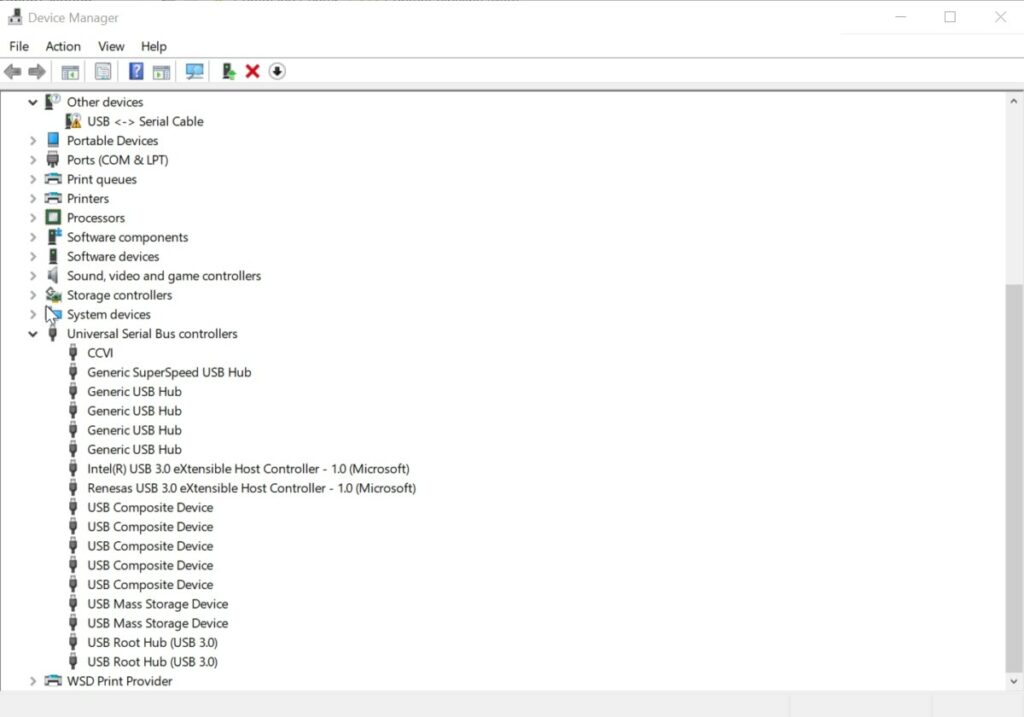
- In the “Device Manager” window, click the + (plus sign) next to Universal Serial Bus controllers. You will see a list of the USB port types installed on your computer.
Port Protection
One of the most expensive parts to repair on your camera is a damaged port. If your tethering cord is plugged into your camera and gets yanked on too aggressively, it can damage the connection points inside the camera and require repair from the manufacturer.
The inexpensive solution to avoid this is to invest in a Jerk Stopper or Tether Block. These devices hold the cable in place at the port so that even if the cord is tripped on or pulled, it doesn’t impact the port directly.
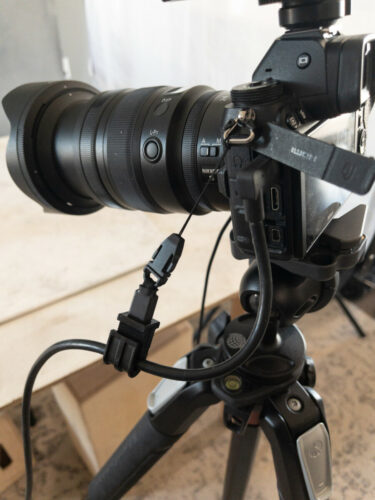
I personally use the Jerk Stopper because it’s a lightweight simple solution. Some folks prefer a more heavy duty Tether Block, but it was a little too bulky for my personal needs and tastes.
Laptop Table
One of the important considerations in setting up your tethered shooting station is to ensure your computer is secure. I have heard horror stories of people tripping on tether cables and laptops falling to the floor.
There are a number of tether table solutions. I use this simple laptop stand. I also recommend if you’re setting up in a heavy traffic area to tape down your tether cables to prevent tripping.
Software Options
The next piece of the tethering puzzle is to select a software that allows you to connect the camera to the computer and captures and displays the images.
There are many options of software. Below, we’ve assembled a list of all the popular options. Most of these offer a 30 day free trial so you can try them out to find which will best fit your needs.
Capture One
A paid software offering the most robust tethering features and is used in a lot of professional studios. It’s compatible with nearly every imaginable camera brand. Capture One is also an image editing software with advanced editing, cataloging and image processing abilities.
Lightroom Classic
Adobe’s desktop image editing software Lightroom Classic also has tethering features for Canon, Nikon, and Sony.
Canon EOS Utlility
This free proprietary software from Canon is for tethering to Canon cameras only. Is not an image processing or editing application. It works very well in both stills and video mode.
Camera Control Pro 2
This paid proprietary software from Nikon is for Nikon cameras only. It is not an image processing or editing application.
Imaging Edge
Free proprietary software from Sony for Sony cameras only. Is not an image processing or editing application.
OM Capture
Free proprietary software from Olympus for Olympus cameras only. Is not an image processing or editing application.
Fujifilm Acquire X
Free proprietary software from Fuji for Fuji cameras only. Is not an image processing or editing application.
Smart Shooter 4
Paid software from Tether Tools compatible with Canon, Nikon, and Sony. Is not an image processing or editing application.
Helicon Remote
A specialty, paid software intended specifically for tethering and shooting with focus stacking.
Dragonframe
A specialty, paid software intended specifically for tethering for purposes of creating stop motion animations.
Cam Ranger
A paid application that enables instant image review via wireless connection on an iPad.
Helpful Features for Shooting Tethered
You have your camera connected to the computer and the software is fired up. Now what? The following are some helpful features to try out.
Adjust Your Camera Settings
Need to change the settings on your camera? Most tethering software will enable you to change the camera’s settings from the computer.
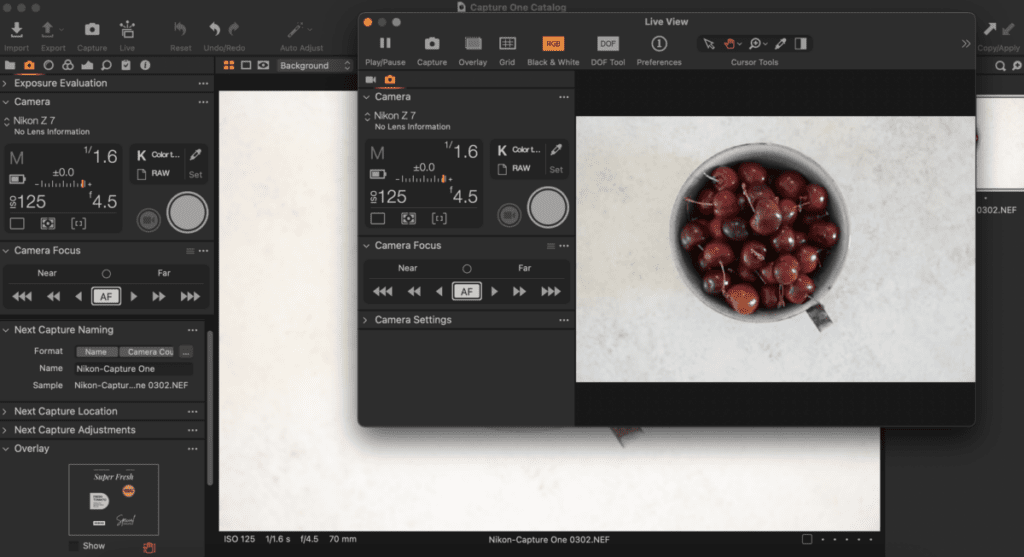
For example, in Capture One, if you want to make an image brighter, instead of going to the camera and adjusting the aperture, ISO or shutter speed, you can do it right from the computer. This is especially helpful if your camera is set up in a high location for an overhead shot and you can’t see the back of the camera easily.
Live View
One of my favorite features in tethering software is not only the ability to see the images that have been captured but also to have a live view window showing in real time what the camera sees. It’s like a video feed of the back of the LCD screen of the “live view” on your camera.
My typical setup for any photoshoot is to have the camera on a tripod and the live view on the computer so that I can compose the scene based on what I’m seeing on the computer. This allows for a lot of control over the composition of the final image.
Nail Tack Sharp Focus
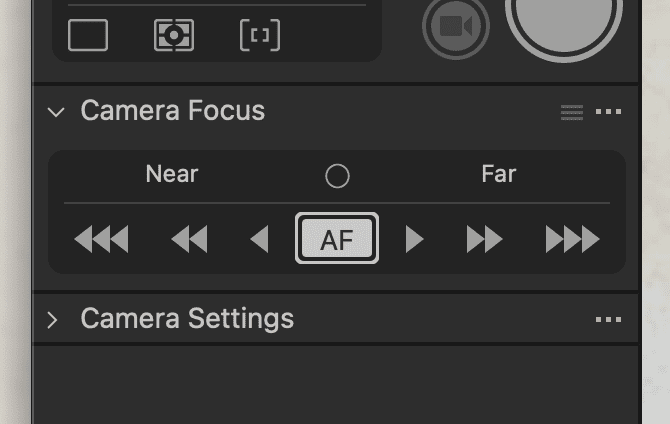
Getting sharp focus is a challenge for many photographers. A great way to ensure you get the focus exactly where you want it is to put the camera in Auto Focus mode and then use the tethering software’s focus features to set it in the exact spot you want it to rest.
For example, in Capture One, use the cursor tool in the live view window and double click to zoom in to the specific spot where you know the focus needs to be placed. Then hit the AF (Auto Focus) button and it will snap the focus to that spot. Hit the shutter button on your tethering software and you should see a perfectly focused shot.
Having Issues Setting Up Tethered Shooting?
Sometimes people run into roadblocks the first time setting up tethered shooting. Here are some troubleshooting tips that can help you figure out what’s going wrong.
Check Your Camera’s Compatibility
Older cameras sometimes aren’t supported by a tethering software. Check the camera compatibility information, like the support page on the Capture One website to verify if your camera is compatible.
Faulty USB ports
Be sure to check that your computer’s USB ports are properly functioning. I had this issue with a bad port on my old laptop. To confirm your ports are working, plug something into the USB port that you know works, such as a thumb drive, mouse or other USB device. Then follow these directions and confirm that the computer sees the device.
- PC: plug in camera > Start Menu > Devices Manager > USB screen shot of this
- Mac: plug in camera > System Information > Hardware > USB screen shot of this
If the computer doesn’t recognize the device, chances are you have a bad USB port that needs to be repaired.
One Software at a Time
A common mistake that is made when people are trying out different tethering softwares is to have multiple softwares open at the same time. This causes a communications traffic jam and will prevent any software from successfully connecting. If you have multiple tethering softwares installed, make sure only one is running at a time.
If you’re brand new to tethering I am so excited for you to experience this shift in your workflow! Also, catch the behind the scenes of a recent photoshoot where we used tethered shooting to capture all the images.


