I recently ran into an issue trying to make a large print of an image that didn’t have a high enough resolution. But good news is that there’s a quick fix inside of Photoshop & Lightroom called the Enhance feature that saved the day and helped me turn a tiny file into a large print poster!
I previously shared a video about understanding megapixels and how to know if your file is large enough to print. If you’re new to the concept of resolution and megapixels, take a couple minutes to watch that video.
So what happens when your photo doesn’t have high enough resolution to print?
Take for example a photo I captured on a family camping trip.
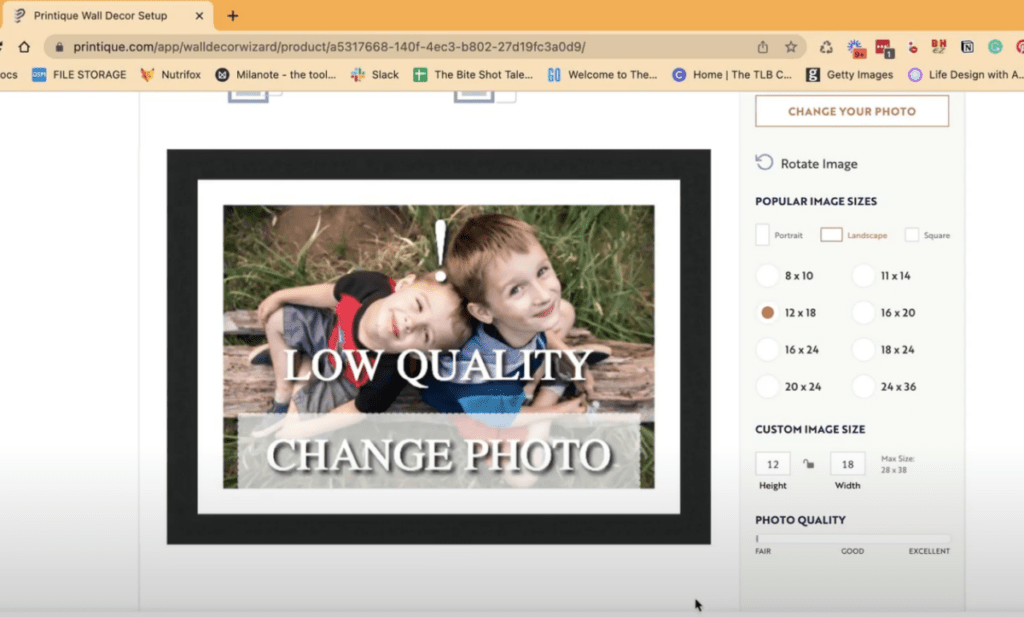
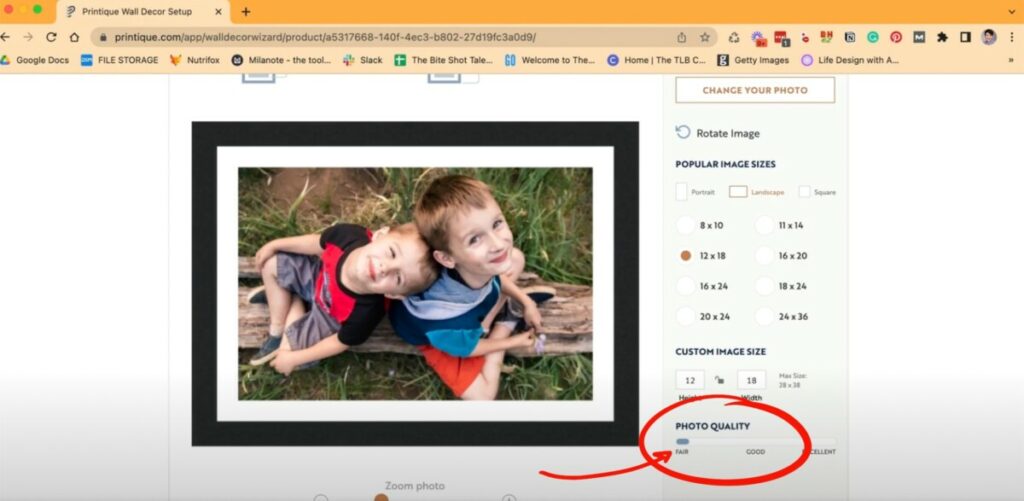
If I wanted to turn this into large print for a holiday gift for the grandparents, I upload it to my go to printer, Printique (use the code “BiteShot10” for 10% off site wide). And let’s say I want the large 12×18 print. The problem is, this file isn’t large enough. It’s only 1000 pixels on the long edge and for a 300dpi print at 12×18 I need approximately 5400 pixels on the long edge for the highest quality print. The website is showing a warning that I need a larger resolution file. However, what if I lost the original file and this small JPG is all I have?
This is where we use the Enhance feature in Lightroom, Photoshop and Adobe Camera RAW.
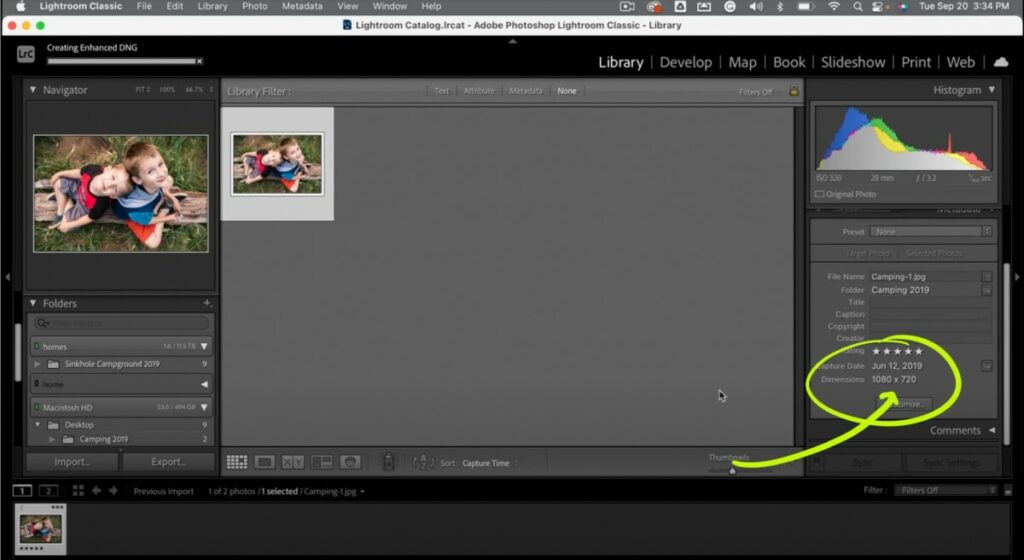
So let’s start by loading the photo into Lightroom. You can see when we’re in the Library module and look to the Metadata the file is 1080 x 720 pixels.
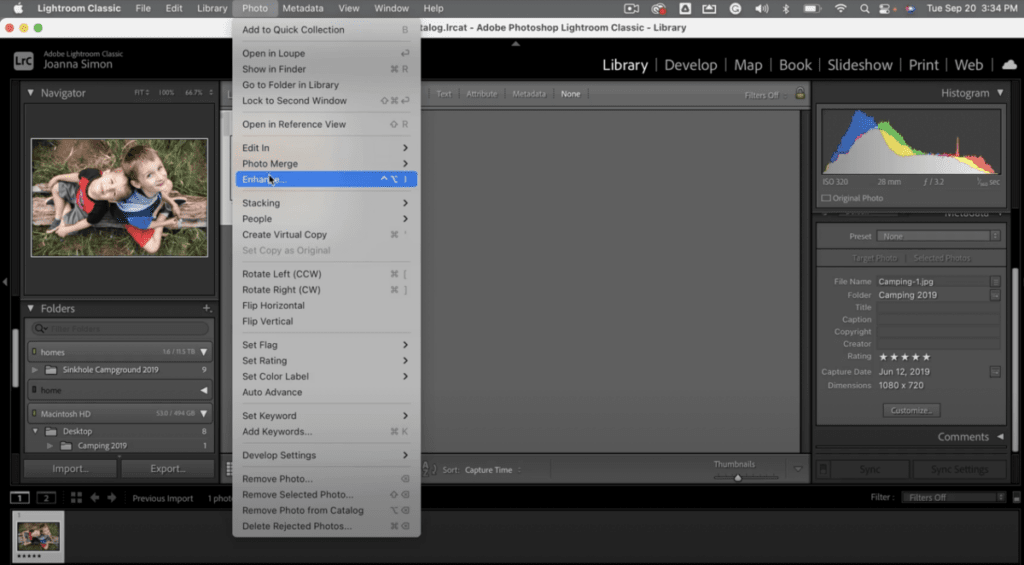
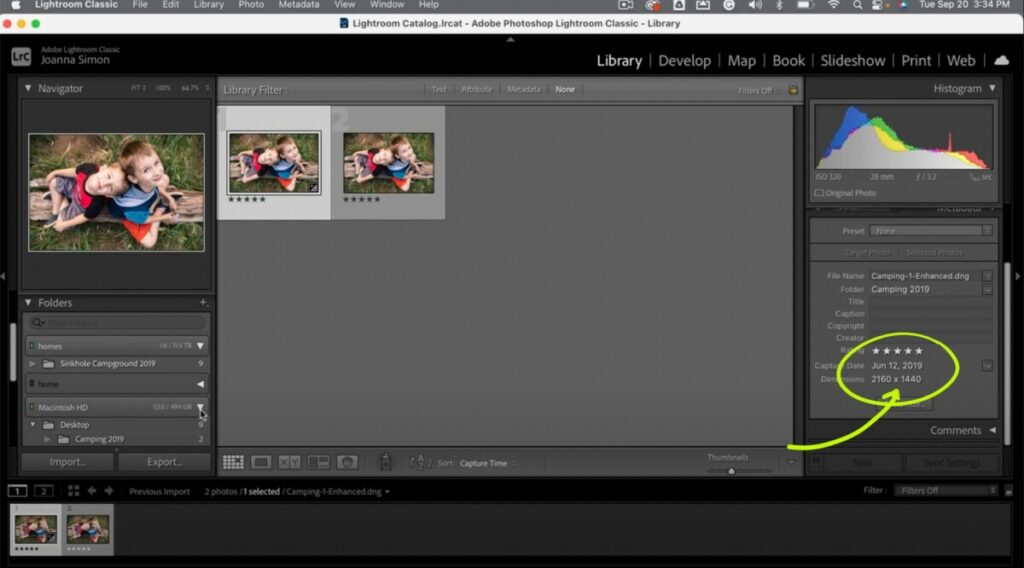
To enhance it and increase the resolution we can go to the Photo Menu then select Enhance. Allow Lightroom to do its thing and then we see it has created a larger 2160 x 1440 version of the image!
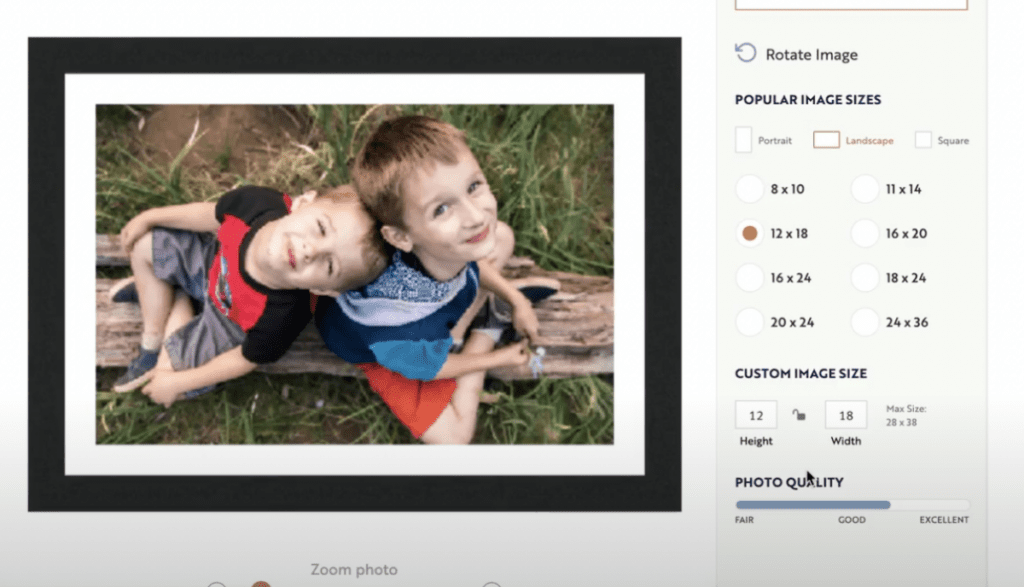
If I upload that to the Printique site now we see that we have a large enough resolution to technically print the 12 x 18, but it is showing that it’s not the best quality.
I want to take another pass at upsizing this file to see if I can get slightly better print quality at this size.
But, Lightroom will only allow one pass of the Enhancement feature. If I try to hit Enhance again it won’t allow it. But, if open the new enhanced file in Adobe Camera RAW, I can enhance it again!
Let’s do it and see how much larger the file can get.
Just right click the enhanced version of the photo and select “open in Photoshop” which will open the image in Adobe Camera RAW. Then go to the three dots on the right and select “Enhance”.
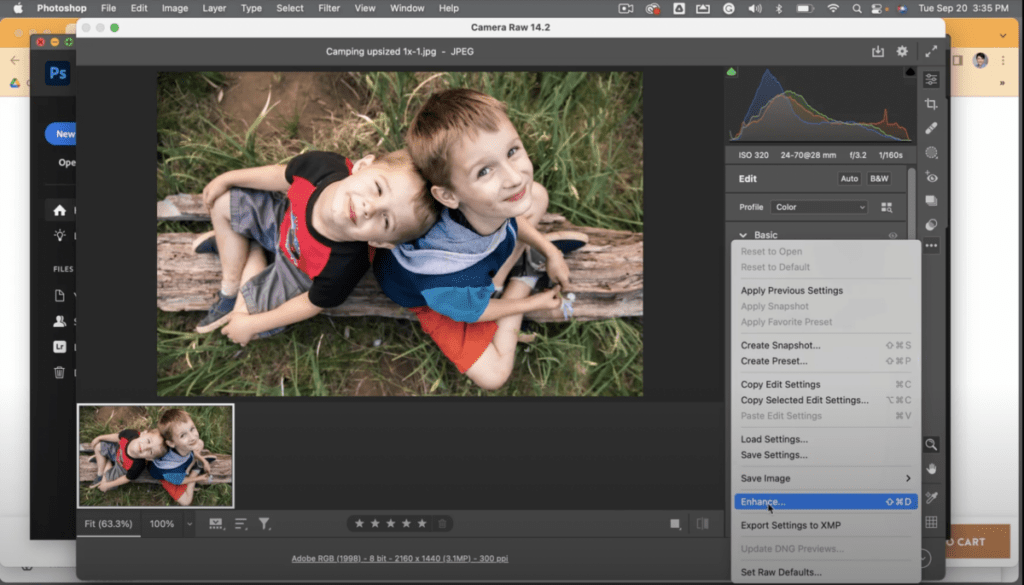
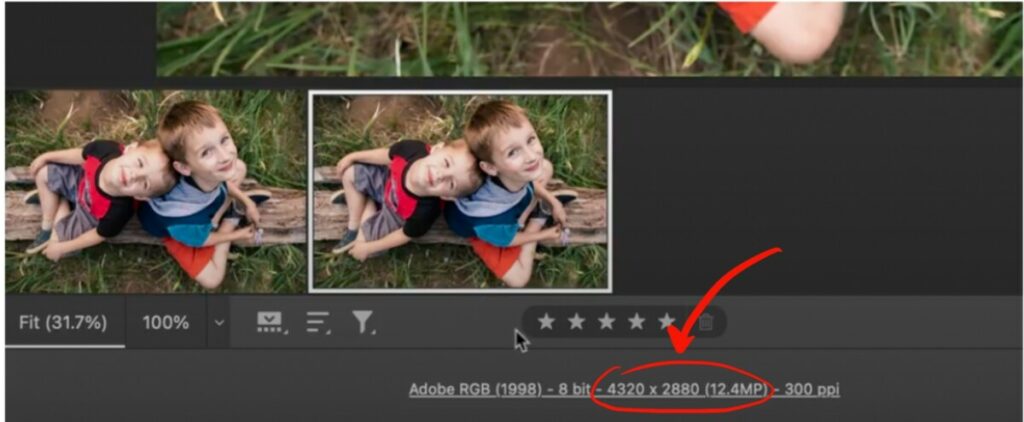
Now we see a 4320 x 2880 version has been created! Let’s load that into Printique and see how it fares.
We now see we have a higher quality image acceptable for printing 12 x 18inches!
Not only is this helpful for upsizing old family photos for giving prints as gifts, but it can be helpful for client work, too!
For example, I know of a member from our community who had an image that the client needed a larger resolution for in order to print it on the cover of a book. Even the original high resolution version of the image wasn’t large enough. She used the enhance feature to add the extra pixels and the client was able to print it to the size they needed with adequate quality.
Next time you run into an issue with resolution, remember that you have a secret tool in your back pocket to add pixels when you need them!
Don’t forget to read last week’s post about Lighting Drinks for Photography! You don’t want to miss it!


